The first time I tackled a bare, shaded bank at the edge of my yard, every ground cover I tried either washed away in rain or gave up under the tree canopy. Then I planted Vinca minor, and within a single growing season, that slope was buried under a glossy green mat studded with blue-violet blooms. If you're ready to learn how to grow periwinkle flowers in your own garden, this guide covers everything — from site prep and planting technique to long-term management. You'll find more practical plant guides like this throughout GardenSynthesis's gardening tips.

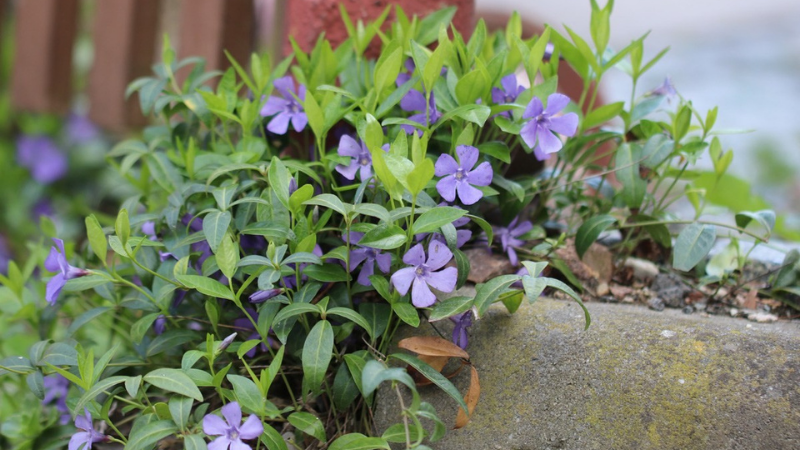
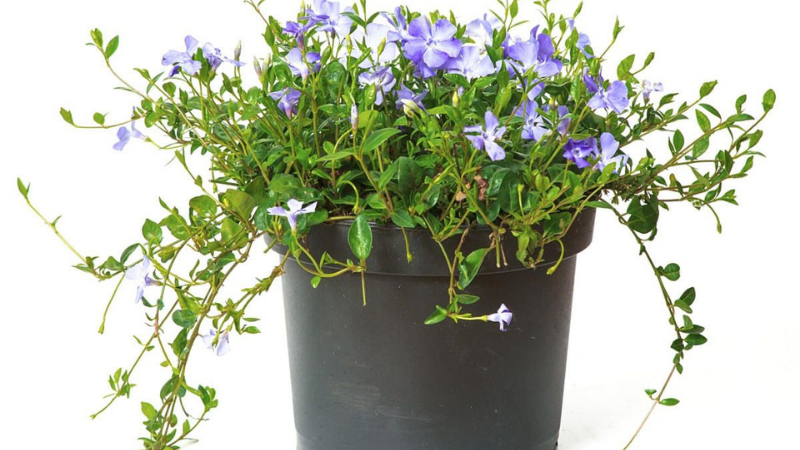
Periwinkle, known botanically as Vinca minor, is a trailing, semi-woody evergreen native to central and southern Europe. It grows 3–6 inches tall and spreads by surface runners that root at the nodes wherever they contact soil. Flowers appear in spring in shades of blue-violet, white, or burgundy depending on cultivar, with occasional repeat bloom through summer and fall.
Its reputation as a tough plant is fully earned. Periwinkle handles deep shade, poor soils, drought after establishment, and competition from surface tree roots — conditions that defeat most other ground covers. Understanding how it actually grows lets you use its strengths deliberately and avoid the handful of situations where it genuinely struggles.
Contents
- Essential Gear and Materials for Planting Periwinkle
- The Fastest Way to Get Periwinkle Spreading
- The Right Time to Plant Periwinkle — and When to Skip It
- Mistakes That Slow Down Periwinkle Before It Takes Hold
- The Real Advantages and Drawbacks of Growing Periwinkle
- How to Grow Periwinkle Flowers the Right Way
- Keeping Your Vinca Minor Healthy All Season
- Beginner Moves vs. Advanced Techniques for Periwinkle
- Building a Periwinkle Planting That Lasts for Years
- Frequently Asked Questions
- Final Thoughts
Essential Gear and Materials for Planting Periwinkle
The Tools You'll Actually Use
You don't need specialized equipment to grow periwinkle successfully, but having the right basic tools on hand makes the job cleaner and faster. Here's what belongs in your kit before you start:
- Garden spade or trowel — for digging individual planting holes or breaking ground in new beds
- Hand cultivator — for loosening compacted soil between plants without disturbing roots
- Garden hose with adjustable nozzle — for gentle, thorough watering at planting and during establishment
- Wheelbarrow or garden cart — for moving compost and mulch to the planting area
- Pruning shears or grass shears — for trimming runners and shaping bed edges each season
- Garden gloves — Vinca minor's sap is mildly irritating to sensitive skin
A basic soil test is worth doing if you're planting in unfamiliar ground. Periwinkle adapts to a wide pH range — roughly 6.0 to 8.0 — but knowing where your soil falls tells you whether any amendments are warranted before you commit plants to the ground.
Choosing Your Starting Material
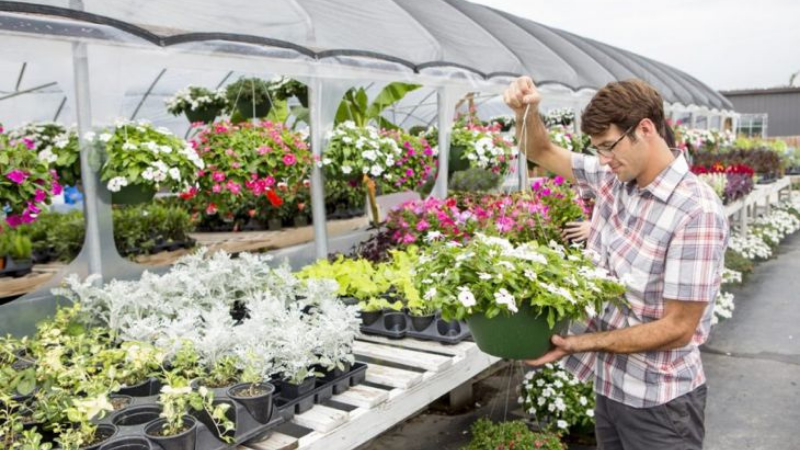
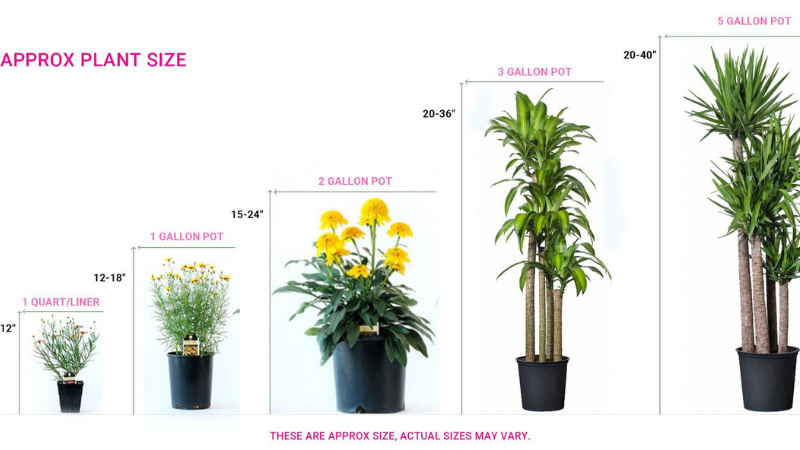
You have three practical options for starting a periwinkle planting: potted nursery plants, bare-root divisions, or stem cuttings. Each has clear trade-offs. Potted nursery plants establish fastest and are the lowest-risk option — right for small areas or when you need reliable coverage by a specific season. Bare-root divisions are significantly cheaper per square foot and ideal for large areas, but they need more attentive watering during the first few weeks. Stem cuttings are essentially free if you have access to an established plant and about six weeks of lead time before you want plants in the ground.
The Fastest Way to Get Periwinkle Spreading
Propagating from Divisions
If speed of coverage is your priority, divisions are your best path. Dig up a mature periwinkle clump in early spring or early fall, pull it apart into smaller sections with your hands or a garden fork, and replant the sections at 12-inch spacing. Each section needs a few roots attached — stems alone won't anchor themselves. Water immediately and keep the soil consistently moist for the first two weeks.
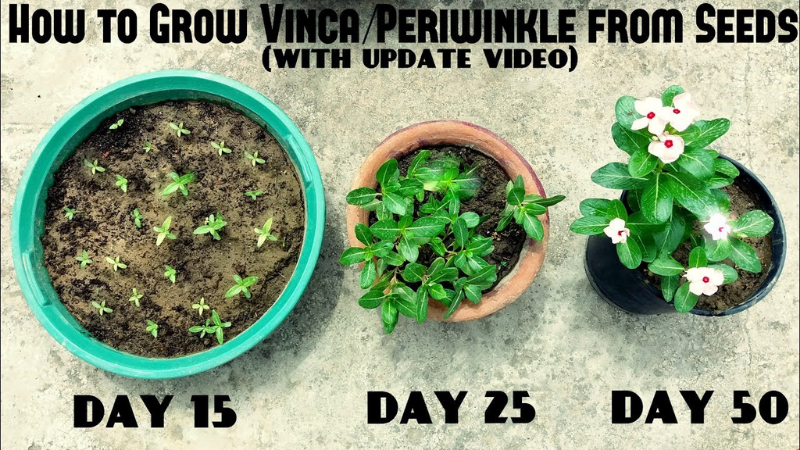
With divisions planted in spring, you'll see active new runners within 6–8 weeks. A bed planted at 12-inch spacing shows noticeable spread by mid-season. By the end of the second season, you'll have a dense, weed-suppressing mat. At 8-inch spacing, that timeline compresses by a full season.
For the fastest coverage, plant divisions at 8-inch spacing rather than the standard 12 inches — you'll invest more upfront, but you'll achieve a closed canopy a full growing season sooner.
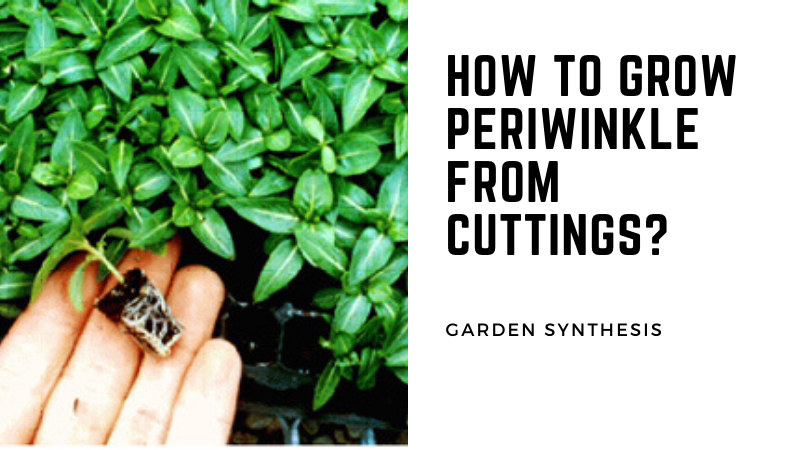
Starting from Stem Cuttings
Stem cuttings are the most economical propagation method when you already have an established plant. Take 4–6 inch cuttings in late spring or early summer, remove the lower leaves, and insert them into moist potting mix or perlite. Roots develop in 3–4 weeks under indirect light. Once rooted, transplant directly into the bed. The advantage is volume — a single mature plant yields dozens of starts. The constraint is timing: plan 4–6 weeks ahead of your target planting date.
The Right Time to Plant Periwinkle — and When to Skip It
Ideal Planting Windows
Periwinkle has two strong planting windows: early spring (4–6 weeks before your last expected frost) and early fall (6–8 weeks before first frost). Spring planting gives roots an entire growing season to establish before summer heat arrives. Fall planting takes advantage of cooler temperatures and natural rainfall, both of which reduce transplant stress and encourage root development before dormancy.
Within those windows, aim for soil temperatures between 50°F and 65°F. Soil that's too cold slows root development significantly. Soil that's already warm pushes the plant into vigorous shoot growth before the root system is ready to support it, which stresses new transplants.

Conditions That Work Against You
Timing matters less than conditions. Avoid planting periwinkle during any of these situations:
- Midsummer heat waves — newly planted divisions wilt rapidly and demand constant irrigation just to survive
- Frozen or waterlogged ground — roots cannot establish in either condition; you'll lose plants before they have a chance
- Drought periods — established periwinkle tolerates dry spells well, but new transplants are not yet drought-tolerant and need reliable moisture
- Sites under black walnut trees — juglone produced by walnut roots is toxic to Vinca minor
- Full-sun, reflective-surface sites in hot climates — periwinkle handles sun in cooler regions but fries against south-facing walls in zones 7 and above
Shade exposure alone is never a reason to delay. Periwinkle handles full shade at any point in the season. What determines the right moment is soil temperature and moisture, not light level.
Mistakes That Slow Down Periwinkle Before It Takes Hold
Planting and Siting Errors
The most common mistake is planting too deep. The crown — the point where stems meet roots — must sit at or just above soil level. Burying the crown even an inch too deep invites rot and kills plants that would otherwise thrive. Always check crown position before backfilling.
The second most common error is placing periwinkle in sites with standing water. The plant tolerates moderate soil moisture but not waterlogged conditions. Roots suffocate before they can establish. If your site drains poorly, raise the planting area 3–4 inches with amended soil, or redirect the planting to a better-suited location entirely.
Warning: Never plant Vinca minor near woodland edges or natural areas without checking your local invasive species list first — it has escaped cultivation in some regions and outcompetes native understory plants.
Watering and Fertilizing Missteps
Overwatering after establishment is more damaging than underwatering. Once periwinkle has rooted in — usually 4–6 weeks after planting — it handles dry conditions well. The problem is that many gardeners keep watering on the schedule they used at planting, which keeps the soil too wet and invites fungal issues at the crown and root zone.
Over-fertilizing is the other common trap. High-nitrogen inputs push lush foliar growth at the expense of root development, and dense leafy growth in a ground cover mat traps humidity that promotes fungal disease. A single application of balanced, slow-release fertilizer at planting is sufficient for most sites. Skip additional fertilizing unless you see clear signs of deficiency — chlorotic leaves, severely stunted growth — in subsequent seasons.
The Real Advantages and Drawbacks of Growing Periwinkle
Why Gardeners Love It
Periwinkle fills a real gap in the plant palette. It provides attractive evergreen coverage in genuinely difficult spots — deep shade, erosion-prone slopes, areas with aggressive surface tree roots — where most other ground covers give up. It's also deer-resistant in most regions, which is significant if you garden where wildlife pressure is a constant challenge. The blooms are a real bonus: the clear blue-violet flowers of the standard form are reliably attractive, and cultivar selection gives you white and burgundy options if you want to coordinate with other plantings. Understanding bloom timing and seasonal care across your garden helps you integrate periwinkle effectively with other flowering perennials — the same attentive approach that helps you keep daylilies blooming all summer applies to getting the most from periwinkle's spring flush.
Where It Falls Short
The plant isn't right for every situation. It spreads by runners and does need periodic boundary management — less aggressive than English ivy, but not zero-maintenance at the edges. In moist, rich soils it spreads more vigorously than expected. Here's an honest comparison of the key factors:
| Factor | Advantage | Limitation |
|---|---|---|
| Shade tolerance | Thrives in deep shade where most plants fail | Bloom density is lower in heavy shade |
| Drought resistance | Established plants need minimal supplemental irrigation | New transplants require consistent watering for 4–6 weeks |
| Spread rate | Fills in reliably over 2–3 seasons | Needs active boundary control; can escape beds in ideal conditions |
| Ongoing maintenance | Very low once established | Periodic hard pruning needed every 2–3 years to prevent stem buildup |
| Soil adaptability | Tolerates a wide range of pH and fertility levels | Does not tolerate waterlogged or severely compacted soil |
| Wildlife resistance | Deer-resistant in most regions | Can be susceptible to vole activity tunneling under the mat in winter |
| Invasive status | Non-invasive in maintained garden beds in most states | Classified as invasive near natural areas in some Mid-Atlantic and Midwest states |
How to Grow Periwinkle Flowers the Right Way
Preparing the Soil
Periwinkle doesn't demand rich soil, but it needs one thing above all else: drainage. Before planting, loosen the top 6–8 inches of soil and work in a 2-inch layer of compost. This improves drainage in heavy clay soils and moisture retention in sandy ones simultaneously. If your soil compacts easily, incorporate a small amount of coarse perlite into the top layer.
Remove existing weeds thoroughly before planting. Periwinkle eventually out-competes most weed pressure, but during the establishment phase it's vulnerable. Weeds that get ahead of new transplants slow the spread measurably and can frustrate a planting that would otherwise fill in quickly. For persistent weed problems in your beds, there are proven strategies for eliminating weeds for good that complement your ground cover planting.
Planting Technique Step by Step
Follow this sequence every time you plant periwinkle, whether you're working with nursery pots, divisions, or rooted cuttings:
- Water the planting area thoroughly the day before to achieve moist — not soggy — soil
- Dig holes slightly wider than each root ball, at the same depth as the container
- Set each plant so the crown sits at or just above soil level — never below it
- Backfill and firm gently around the roots to eliminate air pockets
- Water immediately and thoroughly after planting
- Apply a 2-inch layer of mulch around (not over) each plant to conserve moisture and suppress weeds
- Space plants 12–18 inches apart for standard fill-in, or 8 inches apart for faster coverage
Consistent spacing is non-negotiable. Irregular spacing creates gaps that become weed entry points during establishment. Take the time to measure and mark your spacing before you start digging — it saves you from problems that are harder to correct later.
Keeping Your Vinca Minor Healthy All Season
Watering and Feeding
During the first 4–6 weeks after planting, water whenever the top inch of soil feels dry. Once plants have rooted in and new runner growth is visible, step back significantly. Established periwinkle in most temperate climates needs supplemental water only during extended dry periods — typically two or more weeks without meaningful rainfall.
For feeding, one application of balanced slow-release granular fertilizer (10-10-10 or equivalent) in early spring covers most plantings for the entire season. Avoid high-nitrogen formulas — they stimulate heavy foliar growth that traps humidity in the mat and increases susceptibility to fungal disease. In naturally fertile or regularly composted soils, you may find that no fertilizer at all produces the best results: healthy spread, controlled growth, minimal disease pressure.
Applying a light layer of mulch over your periwinkle bed in late fall moderates soil temperature swings through winter and helps the evergreen foliage stay looking sharp through cold months — a simple step with a noticeable payoff.
Pruning and Renovation
Periwinkle benefits from hard pruning every 2–3 years. Left unpruned, the mat accumulates a thick layer of woody stems at the base that reduces air circulation and creates ideal conditions for fungal disease. In early spring before new growth begins, cut the entire planting back to 3–4 inches with a string trimmer or a lawnmower set to its highest cutting height. The plant rebounds within 3–4 weeks and the resulting growth is notably healthier and denser.
For routine edge maintenance, trim runners that cross into lawn areas, pathways, or adjacent beds once or twice per season. A sharp spade or half-moon edger does this cleanly in a matter of minutes for most garden-scale plantings.
Beginner Moves vs. Advanced Techniques for Periwinkle
What Beginners Should Focus On
If this is your first time with ground covers, start simple. Buy potted nursery plants, choose a defined area with clear physical edges, and plant at 12-inch spacing. Keep the soil moist for six weeks. You don't need to amend soil extensively, fertilize aggressively, or manage anything specialized in year one. The plant does the work once it's in the ground.
Container growing is an excellent low-pressure starting point. Periwinkle performs well in wide, shallow planters — a large container on a shaded patio works perfectly. Use well-draining potting mix, ensure the container has adequate drainage holes, and water consistently. This lets you observe the plant's growth habits up close before committing to a large in-ground planting. By the following spring, you'll have plenty of material to divide for a full bed.
Techniques for Experienced Growers
Once you're comfortable with periwinkle's basic needs, more precise management techniques become worthwhile for specific goals:
- Bare-root planting at scale — for large areas, ordering bare-root plants in bulk is significantly cheaper than nursery pots. Plant immediately on receipt, water thoroughly, and provide temporary light shading if temperatures exceed 70°F during the first week
- Cultivar selection for design intent — move beyond the standard blue-violet form. 'Alba' gives crisp white flowers; 'Bowles's Blue' produces larger, more intensely colored blooms; 'Atropurpurea' offers soft burgundy. Mixing cultivars in adjacent beds creates a layered, intentional look rather than a uniform mat
- Directed layering — pin a long runner to soil in a specific direction using a U-shaped garden pin. It roots at that node, letting you steer expansion deliberately rather than waiting for random spread to reach target areas
- Interplanting with spring bulbs — snowdrops, small narcissus, and scilla naturalize easily through a periwinkle mat, providing early-season interest while the periwinkle hides the bulbs' declining foliage through late spring
Building a Periwinkle Planting That Lasts for Years
Managing Natural Spread
Periwinkle's goal, biologically, is to fill available space. In a defined bed, that's exactly what you want. In an open setting without clear boundaries, it requires active management. The good news: staying ahead of the spread is simple, and reversing it — once you understand how the runners root — is straightforward too.
Check the perimeter of your planting twice per season: once in late spring when runners are actively elongating, and once in early fall before the plant hardens off. Use a sharp spade to cut runners that have crossed your intended boundary, and remove any sections that have rooted outside the bed. For most garden-scale plantings, this takes 15–20 minutes per inspection. Installing a physical edging barrier — landscape edging, a mow strip of brick or concrete — at the perimeter significantly reduces this maintenance by blocking runners at the boundary rather than requiring you to cut them back.
Long-term Renovation Strategies
After 5–7 years, a periwinkle planting can develop bare patches at the center of the mat. This happens because inner stems become woody and less capable of supporting vigorous new growth, while the outer edges continue spreading actively. The fix is targeted renovation: in early spring, remove approximately one-third of the oldest, most woody stems from the center of the mat using pruning shears, then top-dress the bare areas with an inch of compost and water in thoroughly. New growth fills the gaps within a single season.
For a full reset after years of buildup, a hard renovation works reliably. Cut the entire mat back to 3 inches with a string trimmer, apply a thin layer of compost across the bed, and water consistently through the following month. The plant rebounds within 4–6 weeks with fresh, vigorous growth that looks substantially better than the overgrown mat it replaced. Done in early spring before new growth begins, this renovation resets the planting for another 5–7 years of healthy performance.
Frequently Asked Questions
Does periwinkle grow in full shade?
Yes. Vinca minor is one of the few flowering ground covers that genuinely tolerates full shade. Bloom density is highest in partial shade — roughly 2–4 hours of sun per day — but the plant establishes and spreads reliably in deep shade where most other ground covers fail entirely. It's an ideal choice for areas under dense tree canopies where little else survives.
How fast does periwinkle spread?
At standard 12-inch spacing, a new planting shows noticeable spread within the first growing season and provides reasonably dense coverage by the end of the second. At closer 8-inch spacing, you can achieve a closed canopy within a single season. Spread rate depends on soil quality and moisture — richer, moister soils consistently produce faster growth and quicker coverage.
Is Vinca minor considered invasive?
It depends on your location. Vinca minor is classified as invasive in some US states — particularly in the Mid-Atlantic region and parts of the Midwest — where it has escaped garden beds and spread into natural woodland areas. In a maintained garden with defined physical boundaries, it is not typically a problem. Check your state's invasive species list before planting near woodland edges or natural areas.
Can you grow periwinkle in containers?
Periwinkle grows well in containers when given the right conditions. Use a wide, shallow pot with drainage holes and a well-draining potting mix. It performs well as a trailing element in large mixed planters or as a standalone ground cover in a wide pot on a shaded porch or patio. Water consistently but don't allow the container to sit in standing water, and trim runners to keep the plant tidy.
Final Thoughts
Pick your problem spot — the shaded slope, the dry strip under a tree, the bed where nothing has worked — and give periwinkle one season to prove itself. Prep the soil, plant at the right spacing, keep the moisture consistent through establishment, and then step back and let the plant do what it does best. Head to your local nursery this season, pick up a flat of Vinca minor, get it in the ground, and watch a difficult corner of your garden become one of the best-looking areas on the property.


About Lee Safin
Lee Safin was born near Sacramento, California on a prune growing farm. His parents were immigrants from Russia who had fled the Bolshevik Revolution. They were determined to give their children a better life than they had known. Education was the key for Lee and his siblings, so they could make their own way in the world. Lee attended five universities, where he studied plant sciences and soil technologies. He also has many years of experience in the U.S. Department of Agriculture as a commercial fertilizer formulator.
Get FREE Gardening Gifts now. Or latest free toolsets from our best collections.
Disable Ad block to get all the secrets. Once done, hit any button below