A single block of oyster mushroom substrate — roughly the size of a shoebox — can produce over 2 pounds of fresh mushrooms in its first flush, often in under two weeks. That level of output surprises most first-time growers. If you've been curious about how to grow mushrooms indoors, you're already ahead: unlike most edible crops, mushrooms don't need sunlight, a backyard, or even much space. A spare shelf, a closet corner, or a basement nook is genuinely enough to get started. For more home growing guides alongside this one, explore the gardening tips section.
Mushrooms are fungi, not plants — and that distinction shapes everything about how you grow them. They don't photosynthesize. Instead, they break down organic matter — straw, wood chips, coffee grounds — and fruit when environmental conditions trigger them. Temperature, humidity, airflow, and cleanliness are the four levers you'll be managing from start to finish.
This guide covers the entire process: picking a species, gathering the right supplies, handling sterilization, managing your fruiting environment, and getting through multiple harvests. Whether you want a single kit on a kitchen counter or a grow tent running five blocks at once, the same core principles apply.
Contents
- Planning Your Indoor Mushroom Growing Journey
- What You Need to Grow Mushrooms Indoors: Tools and Supplies
- Beginner Kits vs. DIY Setups: Choosing Your Level
- Pro Tips for Bigger Harvests and Fewer Problems
- What a Functional Indoor Mushroom Setup Really Looks Like
- Mistakes That Kill Indoor Mushroom Crops
- Mushroom Growing Myths Worth Ignoring
Planning Your Indoor Mushroom Growing Journey
Before you spend a dollar or move any furniture, a little planning goes a long way. Think about which species you want to grow, how much space you can realistically dedicate, and how many fruiting blocks you want to manage at once. A sustainable indoor operation isn't complicated — it just benefits from thinking a few steps ahead.
Choosing the Right Species
Your species choice determines substrate, temperature range, and how long you'll wait before your first harvest. Here's how the most popular indoor varieties stack up:
| Mushroom Species | Ideal Temp (°F) | Target Humidity | Best Substrate | Days to First Flush | Difficulty |
|---|---|---|---|---|---|
| Oyster (Pleurotus) | 55–75 | 80–95% | Straw, coffee grounds | 10–14 | Easy |
| Shiitake | 55–70 | 80–90% | Hardwood sawdust | 60–90 | Moderate |
| Lion's Mane | 65–75 | 85–95% | Hardwood sawdust | 14–21 | Moderate |
| King Oyster | 50–60 | 75–85% | Straw or sawdust | 14–21 | Easy–Moderate |
| Reishi | 70–80 | 85–95% | Hardwood sawdust | 90–120 | Advanced |
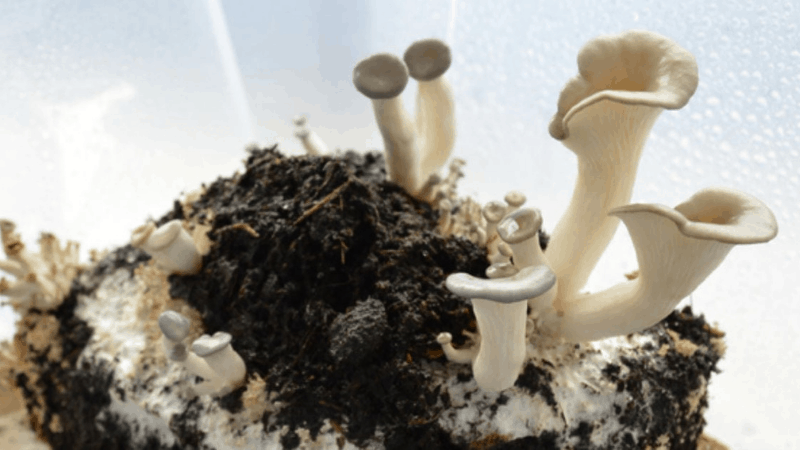
Oyster mushrooms are the clear first choice for beginners. They colonize quickly, tolerate a wider temperature range than most species, and will fruit on straw, cardboard, or coffee grounds without heavy preparation. Shiitake takes longer but rewards patience with dense, meaty caps and excellent shelf life. Lion's mane is more sensitive but increasingly popular — its distinctive cascading white fronds are striking before you even cook them.

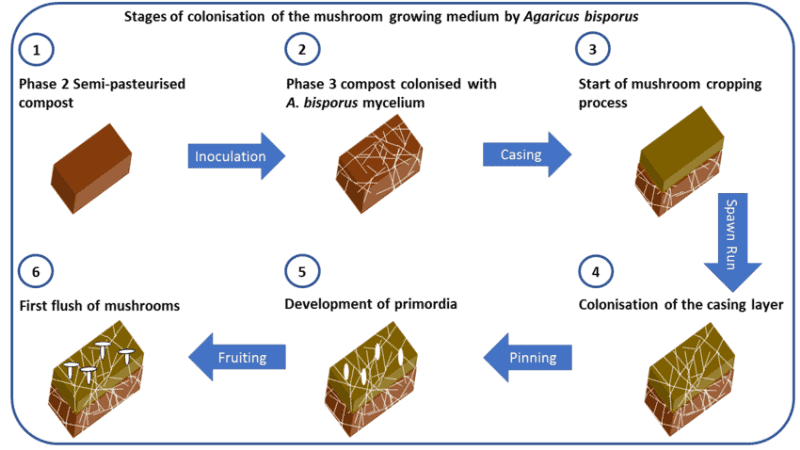
Understanding the Four-Stage Growth Cycle
Every indoor mushroom crop — regardless of species — moves through the same four stages:
- Inoculation — Mushroom spawn (mycelium grown on grain or sawdust) is introduced into prepared substrate.
- Colonization — White mycelium spreads through the substrate over 1–4 weeks. This happens in the dark at stable temperatures.
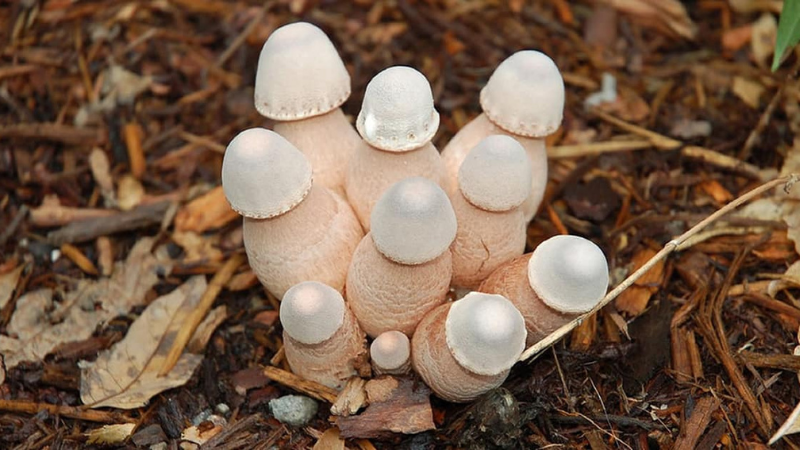
- Pinning — A humidity spike, temperature drop, or fresh air exchange triggers tiny pin formation. These are your emerging mushrooms.
- Fruiting and Harvest — Pins develop into mature caps over 5–10 days. After harvesting, the block rests and reflushes 2–4 more times.
Planning your long-term setup means thinking in cycles. How many blocks do you want in rotation at once? What happens to spent substrate — compost it, dig it into a garden bed, or attempt another inoculation? Working through those questions now prevents bottlenecks later.
What You Need to Grow Mushrooms Indoors: Tools and Supplies
Having the right equipment is where knowing how to grow mushrooms indoors translates into actually doing it successfully. You don't need to spend heavily, but cutting corners on a few specific items tends to produce contaminated blocks and poor yields.
The Essential Supply List
- Mushroom spawn — grain spawn for bulk substrate grows; plug spawn for log inoculation
- Substrate materials — straw bales, hardwood sawdust, or supplemented sawdust with wheat bran
- Polypropylene grow bags with filter patches for gas exchange during colonization
- A pressure cooker (15 PSI) for sterilizing hardwood or supplemented substrates
- Isopropyl alcohol (70%) and disposable gloves for inoculation sanitation
- A digital thermometer and hygrometer — you need actual readings, not guesses
- An ultrasonic humidifier or a dedicated spray bottle for maintaining moisture levels
Lighting is widely misunderstood in mushroom cultivation. Since fungi don't photosynthesize, you're not powering growth with light — you're providing a directional cue so pins orient correctly. Ambient room light is sufficient for most species. If you're evaluating lighting for a multi-crop indoor setup, this comparison of LED lights vs. LED grow lights clarifies exactly what's necessary versus what's overkill.
Setting Up Your Growing Space
Your fruiting environment needs to meet a few non-negotiable conditions: 75–90% relative humidity, a temperature in the appropriate species range, and regular fresh air exchange. Stale air — high in CO2 — is responsible for leggy mushrooms with elongated stems, tiny caps, and disappointing yields.
Air filtration matters more than most beginners expect. A quality carbon filter in any enclosed growing area prevents CO2 and volatile compounds from building up unchecked. Underspeccing filtration is a hidden reason yields underperform — which is one reason cheap activated carbon filters are worth avoiding in any serious indoor growing setup.
Beginner Kits vs. DIY Setups: Choosing Your Level
There's more than one path to growing mushrooms indoors, and the right one depends on your experience, available time, and long-term goals. Starting simple isn't a compromise — for most people, it's the smarter move.
All-in-One Kits: Fast and Foolproof
A pre-colonized mushroom kit arrives ready to fruit. You cut an X in the bag, mist it twice a day, and mushrooms typically appear within a week. The tradeoffs are cost (kits run $20–$40 each) and limited variety — you're working with whatever species and substrate the supplier chose.
Kits are the best way to understand how mushrooms behave in the fruiting stage without committing to sterilization equipment or spawn sourcing. Most beginners are better served starting here and then advancing to DIY grows once they've watched a full crop cycle play out. You'll make smarter decisions about substrate and environment once you've seen what healthy pins and caps actually look like.
DIY Substrate and Spawn for Experienced Growers
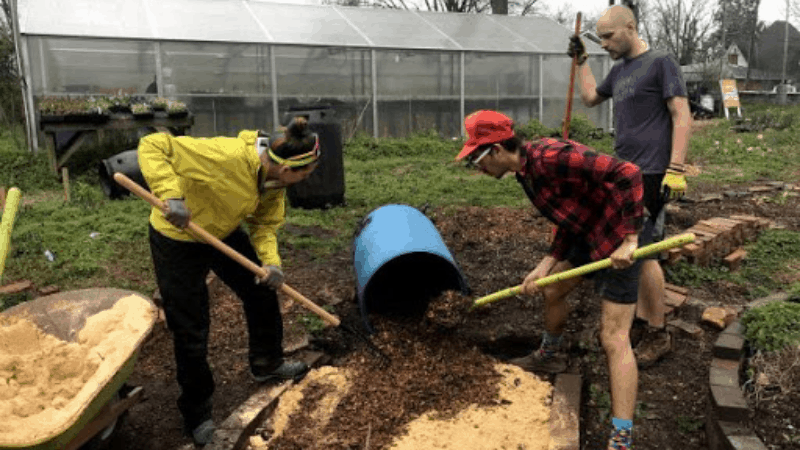
Building your own substrate and inoculating with grain spawn gives you full control — species choice, substrate composition, batch size — and reduces cost per pound dramatically. The responsibility you take on is sterilization. For hardwood or supplemented substrates, pressure sterilization at 15 PSI for 2.5–3 hours is standard. Straw can be pasteurized at lower temperatures (160–180°F) using hot water or steam, which requires significantly less equipment.
Coffee grounds deserve special mention. They're free — most cafés give them away — already pasteurized by the brewing process, and excellent for oyster mushrooms. Many urban growers use them exclusively, cutting both cost and prep time. You can mix in a small amount of straw or bran to adjust water retention and nutritional profile.
Pro Tips for Bigger Harvests and Fewer Problems
Small adjustments to your process can meaningfully change yields. Once your basic setup is running, these variables are where experienced growers focus their attention.
Controlling Temperature and Humidity
Mushrooms are more temperature-sensitive than most growers expect. Oyster mushrooms, for example, pin more reliably at the cooler end of their range — around 60–65°F. Warmer temperatures speed up growth but tend to produce thinner caps with shorter shelf life. Running your fruiting space 5–10°F cooler during the pinning stage and slightly warmer during colonization gives you more predictable results.
Humidity requires actual measurement. Most species fruit best at 80–90% relative humidity, and guessing doesn't work. If your space struggles to hold humidity, a simple plastic tent draped over a shelf traps moisture surprisingly well. If you're dealing with the opposite problem — too much condensation — the breakdown of why grow tents get wet inside covers the airflow and ventilation fixes that apply directly here.
Pro tip: Fan your fruiting blocks for 30 seconds, two to three times per day — elevated CO2 from stagnant air is the single most common reason pins fail to develop or produce small, misshapen caps.
Managing Contamination
Green, black, or orange patches on your substrate are mold contamination — usually Trichoderma or Aspergillus species out-competing mushroom mycelium. Once visible, it can't be reversed. Remove affected blocks immediately to prevent spores from spreading to healthy grows.
- Always inoculate in a still air box or near a laminar flow hood
- Wipe all surfaces with 70% isopropyl alcohol before handling spawn or substrate
- Use fresh, high-quality grain spawn — old or improperly stored spawn fails far more often
- Never open colonizing bags unless absolutely necessary
- Keep pets and high foot traffic away from your growing area
What a Functional Indoor Mushroom Setup Really Looks Like
Reading about conditions is useful. Seeing how real growers configure their space is where it gets concrete. Two setups appear consistently among home cultivators: the shelf method and the grow tent method.
The Shelf Method
A wire metro shelf in a spare bathroom or utility room is one of the most practical beginner configurations. Blocks sit on shelves, a small humidifier runs nearby, and the enclosed nature of a small room naturally traps moisture. A timer-controlled fan handles fresh air exchange. This method scales easily — add another shelf, add more blocks. The main challenge is keeping surfaces clean. Wipe the room weekly with diluted hydrogen peroxide, pair that with quality spawn, and contamination stays manageable.
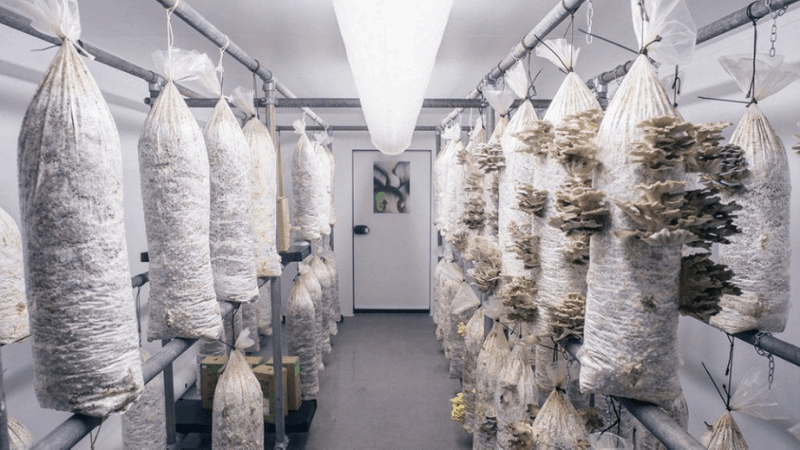
The Grow Tent Method
A grow tent gives you a self-contained, controllable fruiting environment that's isolated from the rest of your home. Environmental consistency improves, contamination pressure drops, and you can dial in specific conditions for more demanding species. If you're weighing this route, the guide on putting a grow tent in your garage covers sizing, airflow, and ventilation decisions that apply equally to basements and spare rooms.
A functional tent setup needs a humidifier, an exhaust fan sized to the tent's volume, and a humidity controller (an Inkbird or similar) to automate the cycle. Upfront cost is higher than a basic shelf setup, but environmental control is significantly better — particularly for species like lion's mane that demand tighter humidity ranges and minimal temperature swings.
Mistakes That Kill Indoor Mushroom Crops
Skipping or Rushing Sterilization
This is the most common reason first harvests fail. Some growers skip sterilization entirely under the assumption that fast-colonizing mycelium will out-compete anything else in the substrate. Others run their pressure cooker for 45 minutes and call it done. Neither works reliably with supplemented hardwood substrates — these are nutrient-dense environments where mold thrives if given any foothold at all.
Full pressure sterilization at 15 PSI for at least 2.5 hours is the standard for supplemented substrates. Straw goes through pasteurization — hot water at 160°F for 1–2 hours works well. Don't rush either process. The time you save upfront is nothing compared to the time you lose to a contaminated batch.
Getting Humidity, Temperature, or Airflow Wrong
Mushrooms signal problems clearly — most growers just don't know how to read the signs. Here's what specific symptoms usually mean:
- Long, thin stems with tiny caps — too much CO2; not enough fresh air exchange
- Dry, cracked caps — humidity too low, often paired with direct fan airflow blowing on the block
- No pins after two weeks of fruiting conditions — temperature too warm, or fruiting triggers weren't applied consistently
- Yellowing or browning mycelium — heat stress, overwatering, or contamination pressure building up
- Aborted pins — usually a humidity crash or sharp temperature drop during early pin development
Tracking your environmental readings daily — even just a quick notebook entry — gives you something concrete to reference when things go wrong. Patterns become visible. Problems become fixable instead of mysterious.
Mushroom Growing Myths Worth Ignoring
Myth: Mushrooms Need Complete Darkness
This comes from the old image of mushrooms growing in dark caves and cellars. In reality, most edible species respond positively to some ambient light. It helps orient growth direction and, for some species, can actually help trigger pinning. Complete darkness isn't harmful, but it's also not necessary — and some growers find their pins cluster toward light sources, producing more uniform flushes.
A few hours of indirect room light or a basic LED on a 12-hours-on / 12-hours-off timer is entirely sufficient. You don't need a grow light spec'd for cannabis or tomatoes — this is one area where simpler is genuinely better.
Myth: Indoor Growing Is Too Complicated for Beginners
The sterilization and contamination management aspects do have a learning curve. But the fruiting process itself is remarkably forgiving. Mushrooms are resilient organisms. A well-colonized block tolerates minor humidity fluctuations and small temperature variations without collapsing. The difficulty comes almost entirely from poor starting conditions — bad sterilization, contaminated spawn, wrong humidity — not from the mushrooms themselves.
Humidity management in particular can feel overwhelming at first. Resources on when to lower humidity during different growth stages offer frameworks around vapor pressure deficit and air exchange that translate directly to mushroom cultivation — the underlying environmental principles are consistent across plant and fungal growing systems.
Frequently Asked Questions
How long does it take to grow mushrooms indoors from scratch?
It depends on the species and method. With an oyster mushroom kit, you can expect your first harvest in 10–14 days from opening the bag. A DIY grow — where you sterilize substrate, inoculate with grain spawn, and wait through colonization — typically takes 4–8 weeks total before your first flush. Shiitake and reishi take longer still, sometimes 2–4 months from inoculation.
Do I need a pressure cooker to grow mushrooms indoors?
Not for every substrate. If you're growing oyster mushrooms on straw or coffee grounds, simple pasteurization with hot water at 160–180°F is sufficient. A pressure cooker becomes necessary when you move to supplemented hardwood substrates, which are nutrient-dense enough to harbor heat-resistant mold spores that pasteurization alone won't eliminate.
What is the easiest mushroom to grow indoors for a beginner?
Oyster mushrooms — particularly pink or blue oyster varieties — are widely considered the most beginner-friendly. They colonize fast, fruit in a wide temperature range, accept inexpensive substrates like straw and coffee grounds, and produce impressive yields relatively quickly. A pre-colonized oyster kit is the lowest-friction way to start.
How do I keep humidity high enough for indoor mushroom growing?
The most reliable options are an ultrasonic humidifier set to maintain 80–90% relative humidity, or manual misting two to three times per day with a spray bottle. Enclosing your fruiting blocks — even loosely, with plastic sheeting or inside a small room — helps retain moisture between misting sessions. A hygrometer lets you confirm you're actually hitting your target range.
Can I reuse substrate after harvesting mushrooms?
Yes, for a limited number of flushes. Most substrates yield 2–4 flushes before nutritional reserves are depleted and contamination risk rises too high to manage. After the final flush, spent substrate makes excellent garden compost or mulch. Some growers also attempt outdoor log inoculation using spent blocks — with mixed but sometimes surprising results.
Next Steps
- Pick one species and order a pre-colonized kit — start with oyster mushrooms if you're new to this. Watch one complete cycle before committing to a DIY setup.
- Set up a basic monitoring station — get a digital thermometer/hygrometer and place it in your intended growing area for a week. Know your baseline temperature and humidity before you introduce any substrate.
- Source your substrate materials — contact a local café about free coffee grounds, or order a straw bale from a feed store. Having substrate ready before your spawn arrives eliminates the most common delay.
- Build a simple contamination prevention routine — designate a clean inoculation area, stock 70% isopropyl alcohol, and commit to wiping surfaces before every session with spawn or substrate.
- Plan your second flush before your first harvest — decide how you'll rest and reflush your block, what you'll do with spent substrate, and whether you want to add a second block to your rotation to keep production continuous.


About Lee Safin
Lee Safin was born near Sacramento, California on a prune growing farm. His parents were immigrants from Russia who had fled the Bolshevik Revolution. They were determined to give their children a better life than they had known. Education was the key for Lee and his siblings, so they could make their own way in the world. Lee attended five universities, where he studied plant sciences and soil technologies. He also has many years of experience in the U.S. Department of Agriculture as a commercial fertilizer formulator.
Get FREE Gardening Gifts now. Or latest free toolsets from our best collections.
Disable Ad block to get all the secrets. Once done, hit any button below