How to Sharpen Pruning Shears At Home – Step by Step Guide
by Lee Safin
It is easier to prune with sharp shears than dull or rusted shears. The perfect cut cannot be achieved without sharpening pruning shears!
The process may seem like a lot of trouble, but it isn’t actually tough. Throughout the article, I will share how to sharpen pruning shears at home easily.
A pruning shear doesn’t that much time to become dull and rusty. You can only remove sap and other buildups by cleaning them. That’s why you have no alternative option but to give it a decent sharpening. Besides, a good sharpening will ensure the material that you’re cutting is not left ragged.
Let’s get to the good part. To sharpen your pruning shear appropriately, you need to follow a specific manner. So just read on! In a few simple steps, you’ll discover how to do this.
Read More – How can you mow over daylilies?
Contents
- Why Do We Need Pruning Shears?
- How to Sharpen Pruning Shears At Home
- Things you will need
- How to Take Care of Pruning Shears?
- Clean the Pruning Shears After Every Use
- Keep the Pruning Shears in a Safe Place
- Frequent Cleaning and Oiling
- Sharpening Requires at least Once a Year
- Avoid Overlooking Wooden Handles
- Why Should You Sharpen Pruning Shears Regularly?
- How to Know the Pruning Shears Sharp Enough?
- Wrapping Up

Why Do We Need Pruning Shears?
Pruning shears are essential to any gardener, whether they’re professionals or amateurs. We use the tools to get rid of spoiled, damaged, and unhealthy branches and stems from plants to encourage healthy growth. Apart from that, using pruning shears, you can also dress up your garden by trimming trees in specific shapes.
Pruning shears can be categorized as bypass, anvil, and ratchet. You can give your beautiful garden an aesthetic look using these handy tools. Hence, you should not be lax about removing dead and diseased branches.
The more you delay, the more damage it will cause to your garden plants. That’s why you should be vigilant and prune every week if necessary.
How to Sharpen Pruning Shears At Home
Sharpening pruning shears is super-easy when you know the suitable method and have the right tools. Additionally, you don’t need a bunch of tools to sharpen pruning shears. Some essential tools are enough to make the job done. Most of these supplies are probably already in your house.
Things you will need
- A decent sharpening tools
- A way of testing your cuts
- Mild liquid soap
- A fresh towel
- Lubricating oil
- A cleaning brush (Not compulsory)
- Steel wool (Not compulsory)
- Wire brush (Not compulsory)
- Any essential oil (Not compulsory)
Step 1— Preparing the area
It is inevitable that you will bungle up when you sharpen or file metal. It produces dust-like metal particles that can prove harmful if gobbled.
Hence, it is crucial to keep your work area is free of drinks, dishes, or food, before sharpening. However, cleaning the area afterward is reasonably straightforward, so you can avoid it too.
Step 2— Protecting Yourself

Keeping hands and eyes protected when sharpening pruning shears is important. Wearing decent-quality gardening gloves will help you to keep your hand safe. Try to choose thick leather gloves if you have scope.


As for protecting eyes, one pair of goggles or heavy-duty glasses is enough to ensure safety. The act of cleaning and sharpening gardening tools can be risky. If you face any accidents while sharpening pruning shears, medical assistance should be sought right away.
Step 3— Cleaning the pruning shears
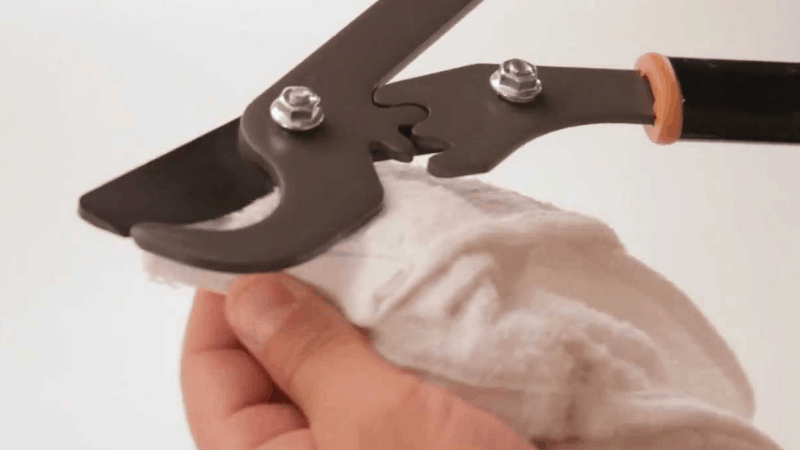
It is common to discover gunk buildup on the surface of your pruning shears. That’s why; cleaning the tools makes sense to eliminate unwanted grease buildup or those impediments.
Depending on how dirty the tools are, this might be as simple as wiping them off with a slightly wet, fresh towel.
However, if you have didn’t take care of it, it has probably become too dirty. Depending on the dirt, you may need to spend some time cleaning it. To clean it up, follow these steps.
Disassembling the Pruning Shears
Your pruners’ blades need to be separated to do the cleaning job appropriately. No worries; all you need is just to unfasten some screws and a bolt. Though not all pruners are constructed in the same manner, everyone will follow a standard process.


Disconnect the blades by removing both the nut and screws, which is keeping the blades together. On the pruner, there are several screws, but you should now only pay attention to the middle screw between the blades. The spring coil between the blades will inevitably come off when the blades are separated.
Keeping an eye on the pieces
Upon disassembling pruners, there are only a few separate parts you will notice. You can use a towel or plate to keep the pieces together. It will prevent the pieces from rolling away unnecessarily.
Washing the pruning shears


Use mild liquid soap and normal temperature, clean water to wash the pruners. Avoid washing the surface aggressively while eliminating the dirt. Then, use a fresh, slightly wet towel to wipe them off. During the drying process, be careful to keep yourself from cutting.
When you’re finished, try to rinse the tools on the water gently instead of soaking them. Soaking the tools will make it prone to rust fast.
Scrubbing the tools if required
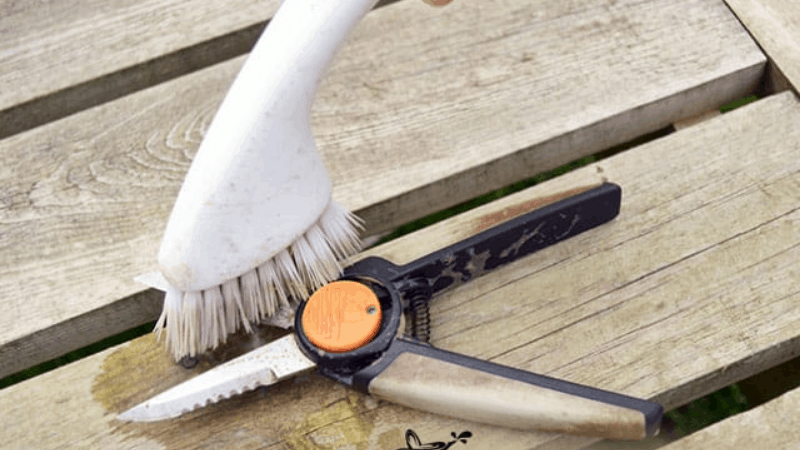
Sometimes, you may face hassle in removing the grease buildup of layers on the surface of the tool. Simple washing may not solve the issue. In that case, a cleaning brush will is necessary to scrub off all the grimes and cake coating from the tools.
If you notice any sticky sap or hard gunk, you can use essential oil to remove these things from the blade surface.
Make sure to clean all the parts of pruning shears, including blades, handle, and other vital spots. Appropriately cleaning all parts will give a new look.
Step 4— Getting rid of rust from the blades
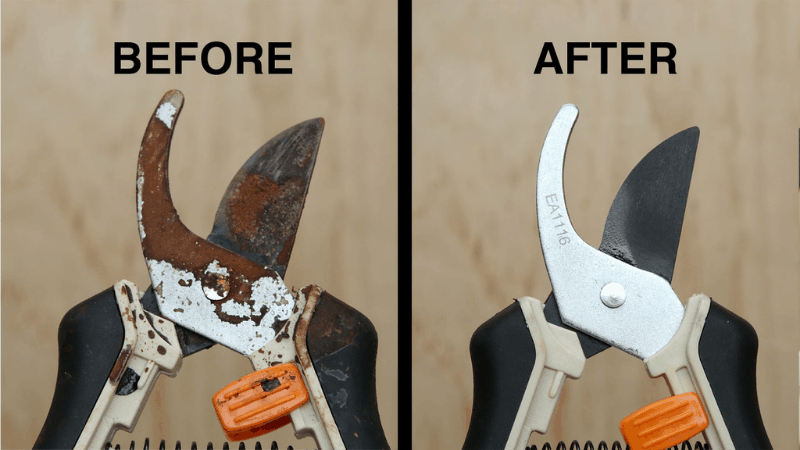
The blades of garden shears can develop rust if they’ve been used for a long time. Because of this, the metal may cling together, making them inconvenient to use.
Follow the following steps if the blades become too much rusty. Otherwise, you can move to step 5 and skip this step 4.
Using a wire brush to eliminate hard, rusty marks


First of all, use a wire brush to dismiss all the tough rusty spots from the blades. Apart from brushing off the rust from the blade surface, don’t forget to work on the edges too.
Using steel wool to take off rust


Sometimes, a wire brush may not be enough to remove those messy rusty spots. That’s why use steel wool to remove all the leftover rust from the surface of the blade.
The blades can be cleaned and polished up quickly in just a few minutes. Your garden shears will look as good as new with a bit of physical work, and you will be ready to sharpen them.
Reassembling the pruners
Your next task is to put all the pruning shears parts together. Join the two parts pruning shears together, place the spring at the proper place, and tighten the screw and nut appropriately. Verify that the blades aren’t too tight and are moving correctly.
Step 5— Choosing the precise angle
The job of eliminating dust and rust has already been completed. Now, it’s time to sharpen the pruning shears properly. The process of how to sharpen pruning shears at home begins with choosing the correct angle.
When you’re filing any blade, you have to follow the exact angle, which it came out of the factory. Using different angles will change the cutting characteristics or even or completely ruin your pair of pruners.
Both right and wrongs ways are available for sharpening blades. When you examine it closely, you’ll notice the angle, which helps it stay sharp. The edge should not be sharpened vigorously and should never go against it.
Sharpening tools should be placed at an angle equal to the existing bevel on the blade. The angle ranges between 20-25 degrees typically.
However, sharpening these tools for the first time may require a little practice to get the perfect angle on the blade.
Step 6— Sharpening the blades
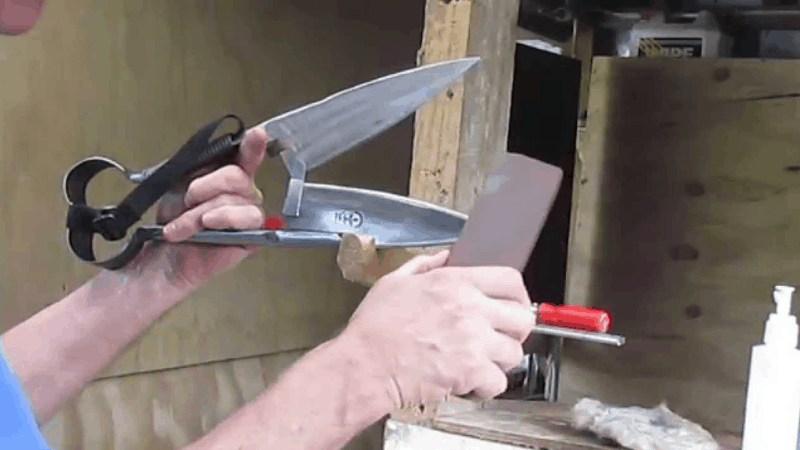
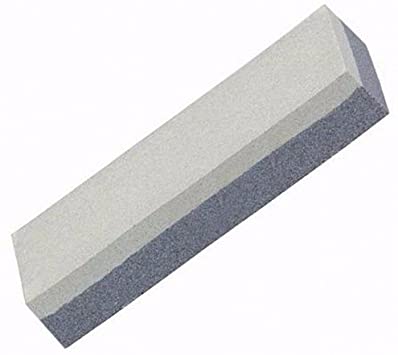
Start from the bottom and gradually move to the tip. One smooth stoke on the blade with the tool sharpener should be used while firmly pressing it.
10-20 repetitions of the same action are recommended. If your blades are excessively rusty and dull, you might have to use 25-30 strokes.
Remember, you need to sharpen both the front and back of the pruning shears using the sharpener tools. Your pruner will be nice and slick, and no jagged edges will be left behind.
By dragging the file down the backside of the angle, turn the shears over and sharpen them. There may need to be a few attempts to do it correctly. After that, you can lightly touch it to see how smooth it is. There should not be any unevenness or roughness on the surface.
Pruners are available with blades that are flat on one side and sharp on the flip side. If you have a one-sided sharp blade, yours will only require sharpening the blade side, not the flat side.
Bora Coarse Combination Sharpening Stone
Step 7— Testing the sharpness
Take some branches or any green leaves to check out how sharp the blade has become. I suggest doing it after every stroke. Continue the process as long as you can cut the leaves perfectly and quickly.
The use of paper to test the sharpness of garden shears is also an easy way to know if the blades have been properly sharpened. When the blades make a clean cut, they are sufficiently sharp.
Step 8— Lubricating the sharpness
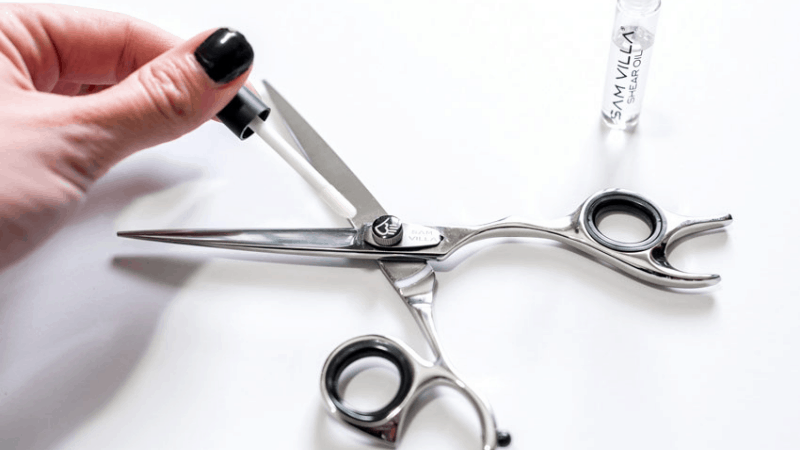
There is no need to perform this step if you don’t want to. However, lubricating your pruner for 5 minutes after sharpening the tools will ensure excellent functionality and a longer lifespan. By doing this, the result will last for an extended time. Apart from that, rust and grime will be prevented from building up on the metal.
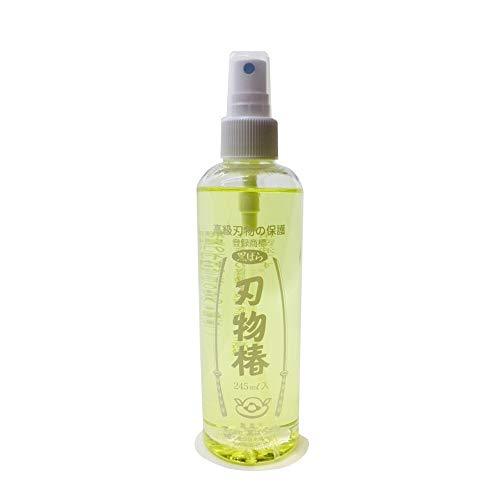
So, which oil you will prefer to use for lubrication? I give more preference to natural essential oils such as mineral oil or linseed oil. However, you have full freedom to use any essential until it doesn’t harm the tools.
You just need to spray your preferred oil on the pruning shears surface simply. After that, rub it in with the dry fabric and mildly wipe off any excess.
KUROBARA Tsubaki Japanese Camellia Oil
How to Take Care of Pruning Shears?
Pruning Shears are one of the heavily used tools for gardens. We often overlook taking care of it appropriately. Aside from ensuring a long lifespan, taking care of these handy tools will decrease the likelihood for soil-borne or weed seeds to spread throughout your garden.
You must be thinking — easy to say, harder to do. Right?
However, maintaining equipment need not be a chore. Either you give few minutes every day (or 1-2 days in a week) to take care of the tools or keep yourself ready for hours of physical works in the off-season.
Clean the Pruning Shears After Every Use
Maintaining the cleanliness of your tools after every use is one of the best solutions to retain longevity. Simply use a fresh towel to get rid of the dust and wiping the sap off your pruners.
Keep your tools in top form by performing these simple tasks. It will be entirely ready for the next time for the subsequent pruning.
Keep the Pruning Shears in a Safe Place
Never make the mistake of leaving your pruning shears on the outside garden. Using the tools to cut through thicker style wood will create a burr on the blade itself.
What’s more, it will surely build up rust on the blades. And, you won’t be able to cut items as smoothly as earlier.
Remember, gardening tools predominantly suffer when they are exposed to moisture. Water-logged soil is often the cause of corrosion. If your tools are covered in mud, rinse them properly before storing them.
If you’re finished using them, store them properly in a dry condition. Hanging them on a wall will be a better option. It is best to store shears in an easily accessible location.
Frequent Cleaning and Oiling

Rust can form from grimes building up and sap on the blades. Brush away dust from crevices using a scrubby pad or stiff brush. After washing them with mild liquid soap and water, thoroughly dry them. When the cleaning task is done, lubricant should be applied a few drops at a time.
Sharpening Requires at least Once a Year
Regular sharpening is always recommended. But if you don’t have time for that, you must sharpen the tools at least once a year to retain their good condition. So that you can cut everything perfectly.
As you follow our guide on how to sharpen pruning shears at home, we believe you won’t have to take professional help for that. Only some essential things and our dedication towards in are enough for doing the job.
Avoid Overlooking Wooden Handles
Like other essential parts, don’t forget to check out the condition of the pruner’s handle. Keep it as smooth as possible by taking care of it. You can apply any finishing with a piece of new fabric on the surface of the handle. Before storing your tools, clean them of excess oil.
Why Should You Sharpen Pruning Shears Regularly?
Just because your pruning shear became a little bit dull doesn’t mean you will have to purchase a new pair of pruning shear.
You have no reason to spend additional money too. You can make rusty garden tools look and function like new with some elbow grease and a little effort.
Using a dull pair of pruners is pretty challenging to cut through at an angle and leaves an uncut piece. Eventually, it affects the health and vigor of the plant.
When you know how to sharpen pruning shears at home, it becomes easy to sharpen the blades and regularly cut everything.
Furthermore, sharpening them from time to time will increase their longevity. It will make pruning the task easier and hassle-free while keeping your beautiful garden healthy.
How to Know the Pruning Shears Sharp Enough?
By looking at the blades’ angle and bevel, it is easy to guess the sharpness level of the blade. The duller tool’s bevel usually has a wider angle between the bevels, approximately 30 degrees.
On the other hand, bevels on sharpened tools are longer, and angles between them are narrower. In pruning shears, it is fundamental to maintain the original degree of angle and bevel.
Keeping shears too sharp can lead to a weaker blade that wears out faster. Conversely, it is more likely for messy cuts to occur if the blade is dull.
Wrapping Up
Once you’ve sharpened your pruners to perfection, you can relax and admire them. Alternatively, you can use them to cut immediately.
An appropriately sharpened pair of pruning shears are necessary as a gardening tool. Besides helping the plants stay healthy, pruning will be easier if your blades are kept sharp. Above all, the tools you use are like investments, so you should keep them in good shape.
Hopefully, you have learned how to sharpen pruning shears at home in an easy-proven way. We’d love to hear your questions and comments if you have any!
Last update on 2023-01-28 / Affiliate links / Images from Amazon Product Advertising API
 |
 |
 |
 |

About Lee Safin
Lee Safin was born near Sacramento, California on a prune growing farm. His parents were immigrants from Russia who had fled the Bolshevik Revolution. They were determined to give their children a better life than they had known. Education was the key for Lee and his siblings, so they could make their own way in the world. Lee attended five universities, where he studied plant sciences and soil technologies. He also has many years of experience in the U.S. Department of Agriculture as a commercial fertilizer formulator.
Thoughts on "How to Sharpen Pruning Shears At Home – Step by Step Guide"
 |
 |
 |
 |
Get FREE Gardening Gifts now. Or latest free toolsets from our best collections.
Disable Ad block to get all the secrets. Once done, hit any button below
 |
 |
 |
 |