Have you ever stared at a sprawling patch of daylilies and wondered if you could just run the mower right through them? You can — but the timing and technique matter far more than most gardeners expect. Knowing how to cut back daylilies correctly is what separates a thriving, reblooming bed from a stressed, slow-recovering one. Whether you're managing a large naturalized slope or a tidy border, this guide covers every angle: when to mow, when to use shears, and how to do it without setting your plants back. For more hands-on advice like this, browse the gardening tips category.

Daylilies (Hemerocallis) are among the most forgiving perennials in any landscape. They tolerate hard cutting, survive the occasional mowing accident, and still deliver dozens of blooms the following season — provided you understand their growth cycle and act at the right moment. If you also grow them in containers, this guide on how to grow lilies indoors pairs well with the outdoor care principles covered here.
This guide breaks the process into six focused sections: the biology of cutting back, timing windows, real-world mowing scenarios, a step-by-step method, a beginner-versus-advanced comparison, and a direct look at the trade-offs between mowing and hand-cutting. By the end, you'll know exactly when to reach for the mower and when to leave it in the shed.
Contents
- Proper Daylily Care: What Cutting Back Actually Does
- When to Cut Back Daylilies (and When to Hold Off)
- Situations Where Mowing Over Daylilies Makes Sense
- Step-by-Step: How to Cut Back Daylilies Without Damage
- Beginner vs. Experienced Gardener: Different Approaches
- The Real Trade-Offs: Mowing vs. Hand-Cutting Daylilies
- Frequently Asked Questions
Proper Daylily Care: What Cutting Back Actually Does
Why Regular Trimming Keeps Daylilies Productive
Daylilies don't self-manage. Left unchecked, dead foliage accumulates around the crown, shading new growth and creating damp conditions where fungal disease takes hold. Cutting back spent foliage redirects the plant's energy into root development and next season's blooms rather than maintaining dead material above ground.
According to the Hemerocallis entry on Wikipedia, daylilies store energy in rhizomes and tuberous roots — not in their foliage. That's precisely why aggressive cutting rarely kills them. The real plant lives underground.
- Removes yellowing leaves that trap moisture against the crown
- Improves air circulation and reduces fungal pressure
- Cuts down on slug and snail habitat — for a full pest strategy, see 21 ways to stop slugs eating plants
- Produces a tidier appearance through the growing season
- Makes spring emergence cleaner and more vigorous
What Happens When You Skip Cutting Back
One missed season is recoverable. Two or three years of buildup creates a different problem entirely.
- Dead foliage mats down over winter and smothers new spring shoots
- Spent scapes left standing attract borers and harbor overwintering fungal spores
- Clumps spread outward aggressively, crowding adjacent plants
- Bloom count drops noticeably as the crown becomes congested
At that point, you're no longer dealing with a simple cutback — you're facing a full dig-and-divide renovation.

When to Cut Back Daylilies (and When to Hold Off)
The Right Windows for Cutting
Timing is the single most important variable when you're learning how to cut back daylilies. Cut at the wrong growth stage and you remove productive tissue; cut at the right stage and you set the plant up for its strongest season yet.
| Season / Growth Stage | What to Cut | Target Height | Best Tool |
|---|---|---|---|
| After bloom (mid-summer) | Spent flower scapes only | Cut to crown level | Pruning shears |
| Late summer / early fall | Yellowing outer foliage | 6–8 inches | Shears or hedge trimmers |
| Late fall (after hard frost) | All above-ground foliage | 2–4 inches | Mower or shears |
| Early spring (before emergence) | Previous year's dead debris | 2 inches | Mower on highest setting |
| Active spring/summer growth | Nothing — do not cut | — | — |
The widest and safest cutting window runs from late fall through very early spring, before new shoots emerge from the crown. This is when mowing carries essentially zero risk to the plant.
Times to Leave Them Alone
As important as knowing when to cut is knowing when to stop. Don't cut back daylilies when:
- New green shoots are already emerging from the crown (spring)
- Plants are in active bloom
- Foliage is still green and actively photosynthesizing (mid-summer)
- You've just divided or transplanted a clump — let it establish for a full season first
Pro tip: If you're unsure whether the foliage has died back enough, wait one more week. Cutting a day too late costs you nothing — cutting two weeks too early can cost you an entire season of blooms.

Situations Where Mowing Over Daylilies Makes Sense
Large Naturalized Beds
When daylilies cover a long fence line, a roadside slope, or a wide embankment, hand-cutting with shears becomes impractical fast. A mower set at its highest blade position (4–5 inches) handles large naturalized beds in a fraction of the time.
- Works well on semi-wild plantings where exact precision isn't critical
- Ideal for dormant-season cleanup before applying a protective winter mulch
- Reduces the physical strain of cutting dense, mature clumps by hand
- Keeps labor time manageable on properties with dozens of linear feet of daylilies
Post-Frost Cleanup
After the first hard frost of fall, daylily foliage collapses and turns brown rapidly. At this point the plant is fully dormant — there's no active tissue left to protect. Running the mower through at 3–4 inches removes the bulk of dead material efficiently and cleanly.
- Eliminates overwintering habitat for insect pests and fungal spores
- Cuts total cleanup time compared to hand-shearing large beds
- Leaves the bed tidy and ready for a layer of mulch before freeze
If weeds are encroaching on your daylily beds at the same time, a post-frost mow handles both in one pass. Follow up with a targeted weed strategy — 4 proven ways to get rid of weeds for good covers the most effective long-term methods.

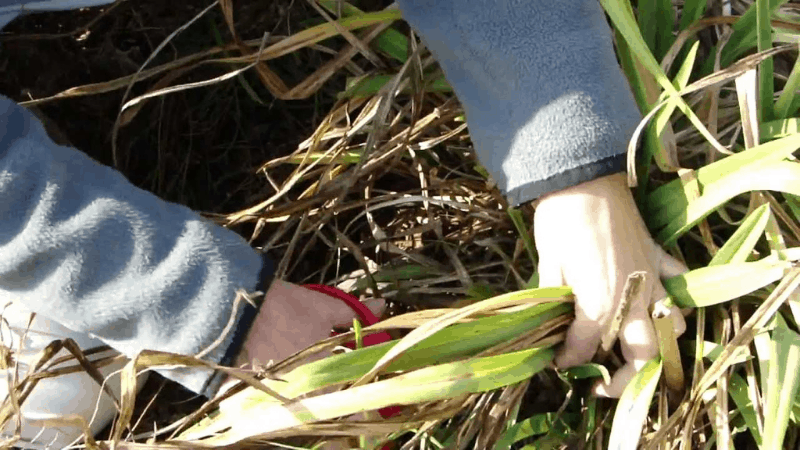
Step-by-Step: How to Cut Back Daylilies Without Damage
Tools and Setup
Choosing the right tool depends entirely on the scale of the job. Using the wrong one wastes time at best and damages plants at worst.
- Pruning shears — best for individual plants, scape removal, and tight borders. Keep them sharp; dull blades crush rather than cut. See this complete walkthrough on how to sharpen pruning shears at home before you start.
- Hedge shears or loppers — efficient for mid-sized beds of 5–20 plants where a mower is too wide
- Lawn mower — the correct choice for large areas. Make sure your mower is in proper working order before each use; if you're unsure about fuel requirements, the lawn mower gas guide covers what you need to know.
- Garden gloves — daylily foliage has fine serrated edges that irritate skin after extended handling
- Rake or leaf blower — for collecting clippings off the crown after cutting
The Mowing Process
- Confirm full dormancy. Foliage should be brown, collapsed, and dry — not partially green. If green remains anywhere in the clump, postpone by 5–7 days.
- Set your mower blade to maximum height. Use the highest available setting, ideally 4–5 inches. Going lower risks slicing through crown tissue.
- Make a single slow pass over the bed. Slower blade speed produces a cleaner cut and reduces crown-level tearing.
- Collect or redistribute clippings immediately. Thick clumps of dead foliage sitting on the crown hold moisture and invite crown rot. Rake them off or bag them.
- Inspect crowns by hand after mowing. Look for any patches of green growth the mower may have missed. Trim those sections with shears.
- Apply mulch if frost is still expected. Two inches of wood chip mulch over the cleared bed insulates the crown without suffocating it.
Warning: Never mow daylilies during active spring growth. New shoots emerge directly from the crown, and a low blade pass removes them cleanly — delaying bloom by weeks on healthy plants and potentially killing weaker ones outright.
Beginner vs. Experienced Gardener: Different Approaches
What Beginners Should Do
If you're new to daylily maintenance, simplify your approach. You don't need to optimize every cut — you need to avoid two critical mistakes: cutting too early in spring and setting the blade too low.
- Schedule your main cutback for late fall or very early spring only
- Remove spent flower scapes as soon as each bloom cluster finishes in mid-summer
- Use hand shears rather than a mower until you're confident about crown location in each bed
- Leave foliage at 4–6 inches rather than cutting to ground level
- Water lightly after a late-fall cutback if the ground is unusually dry going into winter
Beginners often ask whether division is part of the cutting-back process. It isn't. Division is a separate renovation step done every 3–5 years when clumps become congested and bloom count drops. Cutting back happens every season; division does not.
Advanced Techniques for Experienced Gardeners
Once you know the growth cycle well, you can refine your approach significantly:
- Mid-season selective trimming: In mid-July, remove only the outermost yellowing leaves without disturbing the healthy inner foliage. This extends the planting's tidy appearance through peak summer without stressing the plant.
- Scape-by-scape deadheading: Remove each scape at its base the moment it finishes blooming. This redirects energy to remaining open buds and encourages reblooming varieties to send up a second flush.
- Hard fall cut to 1 inch: On established, vigorous clumps in Zone 6 and warmer, cutting to 1 inch after frost speeds spring emergence. In Zone 5 and colder, always follow this with at least 3 inches of mulch over the crown.
- Combined cutback and division: Cut back first, then dig and divide. Removing the foliage before you dig makes crown separation far easier to manage and reduces the mess substantially.
The Real Trade-Offs: Mowing vs. Hand-Cutting Daylilies
Mowing: Where It Wins and Where It Falls Short
Mowing is a genuine time-saver in the right context — but it isn't always the correct tool for the job.
- Advantages:
- Dramatically faster on large beds — a 10-minute pass replaces hours of shearing
- Produces a consistent cutting height across the entire planting
- Ideal during dormancy when precision is less critical
- No specialized technique required beyond correct timing and blade height
- Disadvantages:
- Crown damage risk is real if the blade is too low or timing is off
- Poor precision around adjacent plants, bulbs, or hardscape edges
- Not suitable for potted daylilies or tightly mixed border plantings
- Clipping debris must be raked off crowns immediately after cutting
Hand-Cutting: The Case for Going Manual
Hand-cutting is slower, but it gives you precision that a mower simply cannot match.
- Advantages:
- Precise control around emerging shoots, adjacent bulbs, and tight border edges
- Gentler on crowns — especially important for newly planted or divided daylilies
- Works in any season for targeted tasks like deadheading and scape removal
- Disadvantages:
- Time-consuming on large or densely planted beds
- Requires consistently sharp tools — dull shears tear stems and invite disease
- Physically demanding on established clumps with thick, matted foliage
For most home gardeners, the most effective strategy combines both approaches: mow large dormant areas in late fall or early spring, then switch to hand shears during the growing season for precision deadheading and scape removal. Each tool has a season.
Frequently Asked Questions
Can you mow over daylilies in spring?
Only before new growth emerges from the crown. The moment you see green shoots pushing up, stop mowing and switch to hand shears for any remaining cleanup. Mowing over active spring growth removes new shoots directly and can delay blooming by several weeks or, in weaker plants, eliminate the season's flowering entirely.
How short can you safely cut daylilies back?
During full dormancy — late fall through early spring — cutting to 2–4 inches is safe for virtually all varieties. On vigorous, well-established clumps in Zone 6 and warmer, going as low as 1 inch is acceptable when followed by a mulch layer. Never cut actively growing or blooming plants below 6 inches.
Will cutting back daylilies trigger reblooming?
Removing spent scapes promptly after bloom can encourage reblooming varieties to produce a second flush of flowers. However, cutting back all foliage is a cleanup and health measure — it does not stimulate bloom production. The trigger for reblooming is scape removal, not full-plant cutback.
Get the timing right and daylilies will forgive almost any technique — get it wrong and even a perfect cut won't save the season.


About Lee Safin
Lee Safin was born near Sacramento, California on a prune growing farm. His parents were immigrants from Russia who had fled the Bolshevik Revolution. They were determined to give their children a better life than they had known. Education was the key for Lee and his siblings, so they could make their own way in the world. Lee attended five universities, where he studied plant sciences and soil technologies. He also has many years of experience in the U.S. Department of Agriculture as a commercial fertilizer formulator.
Get FREE Gardening Gifts now. Or latest free toolsets from our best collections.
Disable Ad block to get all the secrets. Once done, hit any button below