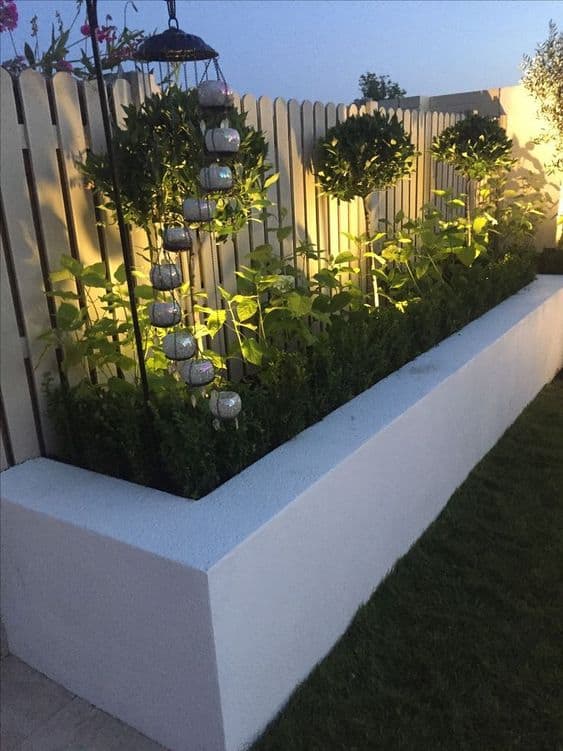
Brick outlasts wood by 30 years or more — and that's the single best reason to learn how to build a brick planter box instead of reaching for lumber. If you're replacing rotted frames every few seasons, a brick planter is the permanent fix. It handles frost, heavy saturated soil, and years of watering without warping or cracking. This guide covers everything: laying the foundation, setting each course, what it actually costs, mistakes to dodge, and how to fix problems when they come up. Browse our gardening tips section for more hands-on garden projects while you're here.

You don't need to be a mason to pull this off. The process is straightforward if you take it one layer at a time. Tools are basic, materials are easy to find at any home improvement store, and the result — a solid planter that can last decades — is worth a weekend of work.
Before you start, decide what you're growing. A raised vegetable bed needs at least 12 inches of depth; a decorative flower border can work with 6 to 8 inches. Pick your spot, measure your space, and have everything on hand before you lay a single brick. That planning up front saves a lot of frustration later.
Contents
How to Build a Brick Planter Box That Stands the Test of Time
Choosing Your Location and Dimensions
Brick is permanent. You're not relocating this planter later without serious effort, so choose your spot deliberately. For vegetables, you want at least six hours of direct sun per day. For ornamental plants, you have more flexibility — a shadier corner works fine for ferns and hostas.
Mark the perimeter with stakes and string before you touch a single brick. A beginner-friendly starting size is 4 feet by 2 feet — big enough to be useful, small enough to keep materials manageable. Keep the width under 4 feet so you can reach the center from either side without stepping in.
Laying a Solid Foundation
This is the step most beginners skip — and the one that causes the most problems down the line. Dig down 4 to 6 inches and fill that space with compacted gravel (crushed stone used as a drainage base). This prevents frost heave (when freezing groundwater pushes structures upward) and keeps your base level for years.
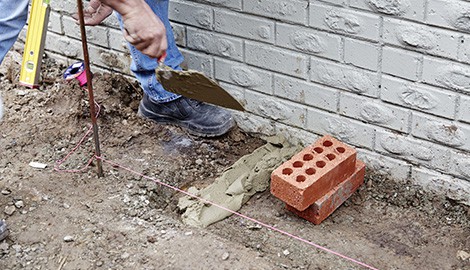
Once the gravel is compacted, lay your first course of bricks dry — without mortar — to check alignment and spacing before you commit. Use iron rods or long stakes at the corners to keep your wall plumb (perfectly vertical) as you build up.
Laying the Bricks Course by Course
Mix your mortar — typically 3 parts sand to 1 part cement — and apply a ¾-inch bed on your prepared base. Set each brick firmly into the mortar and tap with a rubber mallet to seat it. Stagger the joints between rows for maximum strength. This offset pattern is called a running bond, and it prevents long vertical cracks from forming over time.
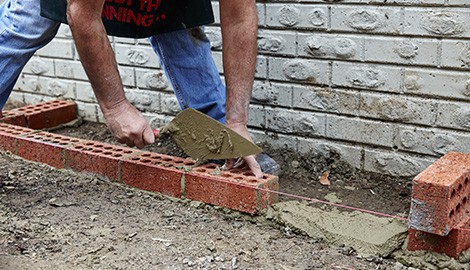
Check level after every two or three bricks. A small lean in the first few courses gets worse as you build higher. Wipe away excess mortar before it hardens — scraping dried mortar off brickwork later is far harder than it sounds.
Pro tip: Mix only as much mortar as you can use in 30 minutes. Mortar that sits too long stiffens and loses its bonding strength — mix a fresh batch rather than trying to loosen an old one.
Mistakes That End Up Costing You More
Forgetting Drainage
This is the single most common mistake. Brick walls are solid, and without drainage, water collects at the bottom. Roots rot. Saturated soil expands and eventually pushes your walls apart. Leave weep holes — small 1-inch gaps — every 18 inches along the base course. If you forget at build time, drill through the mortar joints before everything fully cures. It takes five minutes and saves the whole structure.
Using Straight Topsoil
Plain topsoil compacts hard inside contained spaces and drains poorly. Before filling your planter, mix in compost and perlite (a lightweight volcanic material that improves drainage and aeration). A reliable ratio: 60% quality topsoil, 30% compost, and 10% perlite. If you're planning to grow root vegetables, our guide on how long potatoes take to grow covers exactly how soil depth and quality affect your harvest.
Skipping the Interior Seal
Brick and mortar are slightly porous. Over time, minerals can migrate into the soil and shift its pH (the measurement of acidity and alkalinity on a scale of 0 to 14). Coat the inside of the planter with a waterproof masonry sealer before adding soil. It takes about 20 minutes and protects both the structure and your plants for the long haul.
When Your Brick Planter Box Has Problems
Cracks in the Mortar
Hairline cracks in the first year are normal — mortar cures and settles slightly as it dries. Fill them with a flexible mortar repair caulk, available at any hardware store. Wider cracks, anything a credit card can slide into, signal a structural issue. That usually points to missing drainage or a weak base. Fix the underlying problem before you patch the surface or you'll be back patching again in a few months.
Water Pooling at the Bottom
Standing water after rainfall means drainage isn't working. Check the weep holes — they may be clogged with compacted soil or roots. Clear them with a stiff wire or thin rod. If holes were never added, drill them now. Laying 2 inches of gravel at the very bottom of the planter interior before adding your soil mix provides a solid backup drainage layer.
Walls Bowing Outward
Bowing walls mean wet soil is exerting more lateral pressure than the wall can resist. This happens most often when a wall is too tall and too thin, or when mortar wasn't applied consistently. For walls taller than 18 inches, add metal wall ties (thin metal straps available at masonry supply stores) spanning the planter's width every few courses during construction. For walls already bowing, partial rebuilding is often the only lasting fix.
Warning: Never fill a brick planter right to the brim with heavy, wet soil. The combined weight and hydrostatic pressure can crack even well-built walls — keep at least 2 inches of clearance at the top.
What People Get Wrong About Brick Planters
"Brick Toxins Will Kill Your Plants"
This concern comes up constantly and it simply isn't accurate. Standard clay bricks are inert — they don't release harmful chemicals into soil. Reclaimed bricks with old paint or industrial residue are worth inspecting before reuse, but new clay bricks are completely safe for edible plants. According to Wikipedia's overview of raised-bed gardening, what matters most is the container material — and fired clay brick poses no concern for plant health.
"You Need a Professional to Build One"
You don't. A simple rectangular planter box is the perfect beginner bricklaying project. If you can spread peanut butter evenly on toast, you can apply mortar to a brick. The hardest part is keeping everything level, and a $5 bubble level handles that. You're not building a load-bearing wall or a structural foundation — you're stacking bricks in a box shape with mortar between them.
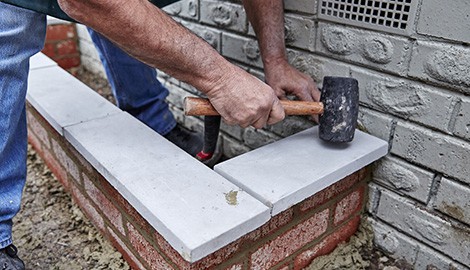
"Design Doesn't Matter for a Small Box"
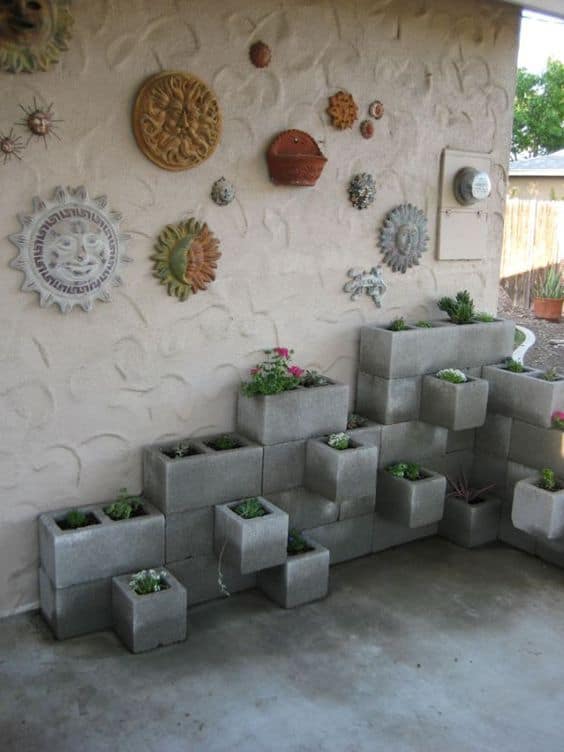
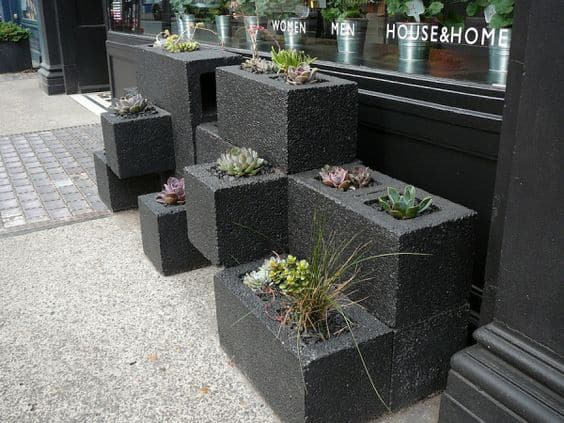
Design matters more than people expect. Tall, narrow walls fail faster than short, wide ones. Any wall over 24 inches tall should be at least 8 inches thick — two full bricks wide — to handle lateral soil pressure. A stepped or tiered planter naturally distributes load across multiple levels and handles sloped terrain particularly well, like the stair-style design above.
What a Brick Planter Box Actually Costs
Material Cost Breakdown
For a standard 4×2 foot planter built two to three courses high, here's what you're realistically spending:
| Item | Estimated Cost | Notes |
|---|---|---|
| Standard clay bricks (100–150 count) | $60–$120 | Price varies by region and supplier |
| Mortar mix (one 60-lb bag) | $8–$15 | Covers approx. 35–40 bricks |
| Gravel base (1–2 bags) | $10–$20 | Crushed stone for the drainage layer |
| Masonry sealer (interior coat) | $15–$25 | Protects walls and maintains soil pH |
| Soil mix (3–4 cubic feet) | $20–$40 | Use raised-bed or quality potting mix |
| Tools (trowel, level, rubber mallet) | $30–$60 | One-time purchase — reusable on future projects |
| Total (approx.) | $143–$280 | For a basic 4×2 ft planter, 2–3 courses high |
Pre-built decorative planters of similar dimensions often run $200 to $500 at garden centers — and most are made from composite materials that won't outlast a well-built brick structure. Build it yourself and you get better durability for less money.
Cutting Costs Without Cutting Corners
Reclaimed bricks from demolition salvage yards often cost half the price of new ones. Check local classifieds and Facebook Marketplace — people regularly give away usable bricks for free. If you already own basic masonry tools, total material costs can drop under $100. For soil amendments, free compost is your best ally. Our guide on whether grass clippings work as fertilizer covers a zero-cost soil additive that's genuinely worth layering into your planter mix.
Frequently Asked Questions
How many bricks do I need for a basic planter box?
For a 4×2 foot planter built two courses high, plan on 80 to 100 standard bricks. Add 10% extra for cuts and breakage. Once you've finalized your dimensions, an online brick calculator will give you a more precise count based on your brick size and mortar joint width.
Do I need mortar for a brick planter box?
You can build a dry-stack planter without mortar for a low decorative border, but it won't hold up to regular watering and the pressure of saturated soil over time. If you're actually filling the planter and growing in it, use mortar. The added durability is worth the extra step.
How deep should a brick planter box be for vegetables?
Most vegetables need at least 12 inches of soil depth to grow well. Root vegetables like carrots and potatoes need 18 inches or more. Two courses of standard bricks give you roughly 6 inches of interior depth — enough for herbs, but not most vegetables. Aim for three to four courses minimum if you plan to grow food.
Final Thoughts
You now have everything you need to build a brick planter box that's genuinely built to last. The technique isn't complicated — it's methodical. Grab your materials, pick your spot, and lay that first course this weekend. Once it's done, it will be sitting in your garden decades from now, growing whatever you put in it season after season.


About Lee Safin
Lee Safin was born near Sacramento, California on a prune growing farm. His parents were immigrants from Russia who had fled the Bolshevik Revolution. They were determined to give their children a better life than they had known. Education was the key for Lee and his siblings, so they could make their own way in the world. Lee attended five universities, where he studied plant sciences and soil technologies. He also has many years of experience in the U.S. Department of Agriculture as a commercial fertilizer formulator.
Get FREE Gardening Gifts now. Or latest free toolsets from our best collections.
Disable Ad block to get all the secrets. Once done, hit any button below