Picture this: it's a calm weekend morning, your lawn is overdue for a cut, and you turn the ignition key — nothing but a hollow click. If you've been there, understanding how a lawn mower starter works can save you real frustration and an unnecessary repair bill. For broader yard upkeep strategies, browse the gardening tips section. This guide walks you through every component in the starter circuit — the motor, solenoid, battery, and cables — so you know exactly what's happening when you turn that key.

Most homeowners treat the starter as a black box — something that either works or doesn't. But the system is actually straightforward once you break it into parts. There are two main types: electric starters (found on riding mowers and many self-propelled models) and recoil starters (the pull-cord systems on walk-behind mowers). Both accomplish the same goal — cranking the engine until combustion takes over — but they do it through completely different mechanisms.
Whether you're diagnosing a no-start condition or just want to maintain your equipment proactively, this guide covers it all. You'll also want to check out our deep-dive on how a lawn mower engine works to see how the starter fits into the bigger picture.
Contents
- Understanding How a Lawn Mower Starter Works
- Electric vs. Recoil Starters: A Side-by-Side Comparison
- How the Starting Sequence Works Step by Step
- Routine Maintenance to Keep Your Starter Reliable
- When Each Starter Type Makes the Most Sense
- Repair vs. Replace: What the Costs Look Like
- Why Your Mower Won't Start and How to Fix It
- Frequently Asked Questions
Understanding How a Lawn Mower Starter Works
At its core, the starter system converts electrical or mechanical energy into rotational force that spins the engine's crankshaft until the air-fuel mixture ignites. Once combustion starts, the engine sustains itself and the starter disengages. According to Wikipedia's overview of starter motors, this principle applies consistently across all small engine types.
The Starter Motor Explained
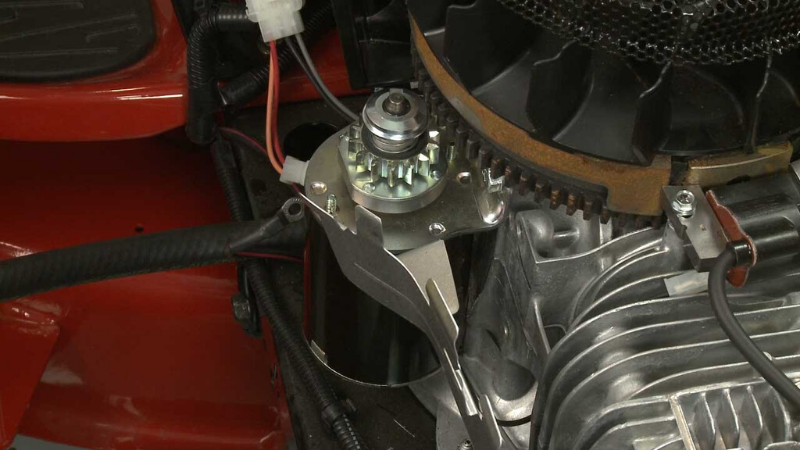
On electric-start mowers, the starter is a compact DC motor mounted near the engine block. When energized, it spins a small gear — called a pinion gear — that meshes with teeth on the engine's flywheel. The flywheel rotates, the piston moves, and combustion begins.
- Starter motors typically draw 50–150 amps during cranking
- They operate for only a few seconds at a time
- Overheating from repeated cranking attempts is a common failure cause
Understanding this also helps when diagnosing related components — the ignition coil and spark plug work in sequence with the starter to achieve a clean start.
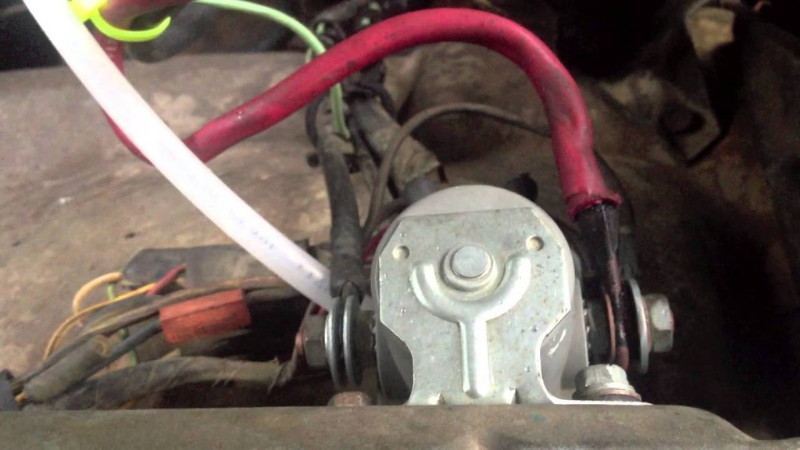
The Solenoid's Role
The solenoid acts as a high-current relay. Your ignition key or push button carries only a small signal current — not enough to run the starter motor directly. The solenoid receives that signal and closes a heavy-duty circuit between the battery and the motor. Think of it as a gatekeeper that handles the heavy lifting so your switch wiring stays light and manageable.
Electric vs. Recoil Starters: A Side-by-Side Comparison
Choosing between starter types often comes down to mower category and your physical preference. Here's how they stack up:
| Feature | Electric Starter | Recoil (Pull-Cord) Starter |
|---|---|---|
| Common on | Riding mowers, zero-turns, premium walk-behinds | Most walk-behind push mowers |
| Starting effort | Button press or key turn | Physical pull — can be strenuous |
| Reliability | Dependent on battery charge | Fully mechanical — no battery needed |
| Maintenance | Battery, terminals, solenoid | Recoil spring, rope, pawls |
| Repair cost | $30–$150+ depending on part | $10–$40 for most repairs |
| Cold-weather performance | Reduced battery output below 40°F | Unaffected by temperature |
If you run a Kawasaki FR or FS engine, it almost certainly uses an electric starter as part of its commercial-grade design.
How the Starting Sequence Works Step by Step
Electric Starter Sequence
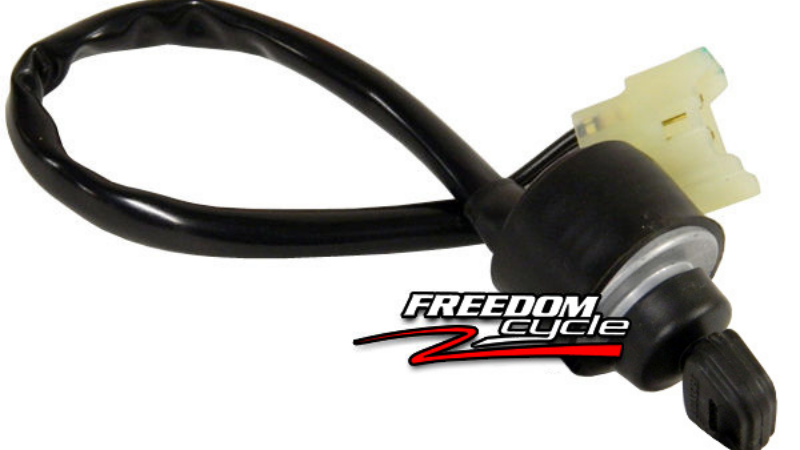
- Turn the key or press the start button — a low-current signal travels to the solenoid
- The solenoid energizes, closing the high-current circuit between battery and starter motor
- The starter motor spins its pinion gear into the flywheel ring gear
- The crankshaft turns, the piston compresses the air-fuel mixture, and the spark plug fires
- Combustion ignites — the engine runs under its own power
- The starter's pinion gear automatically retracts to prevent over-spinning
Recoil Starter Sequence
- You pull the cord rapidly, unwinding it from the recoil drum
- The drum's pawls engage the flywheel, spinning the engine
- The recoil spring stores tension and retracts the cord when released
- Repeated pulls build enough crankshaft speed for ignition
A worn spark plug at this stage can prevent ignition even when the starter mechanism is working perfectly — so it's worth inspecting both systems together.
Routine Maintenance to Keep Your Starter Reliable
Battery and Cable Care
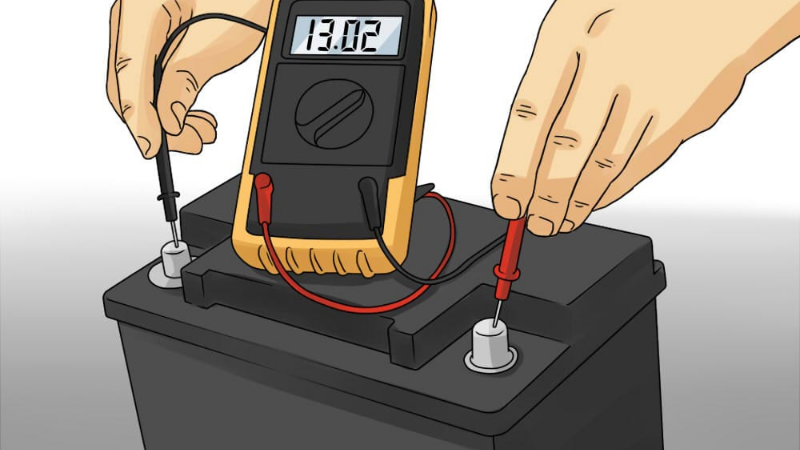
The battery is the most commonly neglected part of the starter system. A weak battery that measures 12V at rest may drop to 9V under cranking load — not enough to drive the solenoid reliably.
- Test battery voltage with a multimeter before each season — aim for 12.6V fully charged
- Use a trickle charger during storage months to prevent sulfation
- Inspect cable connectors for fraying or corrosion at least once per season
- Check the oil level while you're at it — low oil can trigger safety cutoffs that mimic starter failure
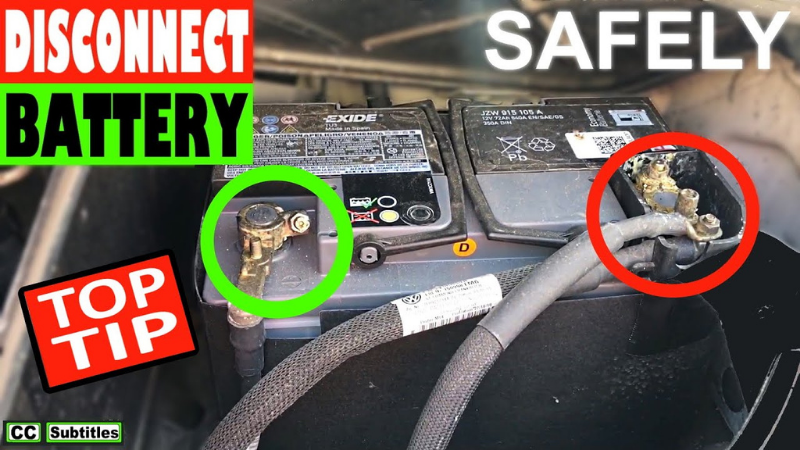
Pro tip: Always disconnect the negative cable first when working on the battery — reconnect it last. This simple order prevents accidental short circuits.
Cleaning the Terminals
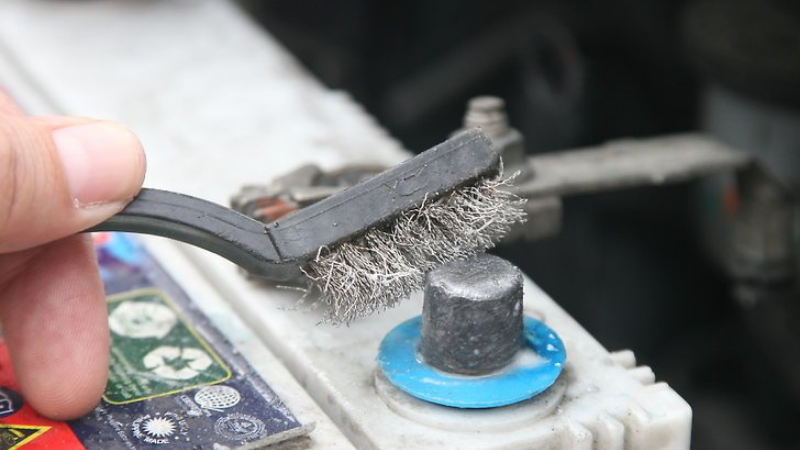
Corroded terminals are one of the leading causes of a dead-seeming mower. Green or white deposits create resistance in the circuit, dropping voltage before it even reaches the solenoid.
- Mix a tablespoon of baking soda with water to make a cleaning paste
- Apply with an old toothbrush and scrub the terminal posts and cable clamps
- Rinse, dry thoroughly, and apply a thin coat of dielectric grease
- Retighten all connections — even a slightly loose clamp causes voltage drop
When Each Starter Type Makes the Most Sense
Your choice (or your mower's built-in type) often reflects the scale and style of your lawn work. Here's a practical breakdown:
- Electric starter is the better fit when:
- You have a large lot requiring a riding mower
- Physical limitations make pull-starting difficult
- You start the mower frequently (multiple times per session)
- You prefer a push-button experience with minimal physical effort
- Recoil starter is the better fit when:
- You have a small or medium-sized lawn with a walk-behind mower
- You want fewer components that can fail
- Budget is a priority — recoil systems are cheaper to repair
- You store the mower in an unheated garage where batteries may drain
Many premium mowers now include both systems — the electric starter as the primary method and a recoil backup for emergencies. This hybrid approach is common in commercial-grade equipment. If you're newer to lawn equipment maintenance overall, our beginner gardening tips offer a broader orientation to tools and upkeep.
Repair vs. Replace: What the Costs Look Like

Before calling a repair shop, it helps to know what individual components cost. Here's a realistic breakdown for DIY repairs:
- Starter motor replacement: $25–$80 for the part; 30–60 minutes of labor if DIY
- Solenoid replacement: $8–$25 — one of the most affordable fixes in the starter circuit
- Battery replacement: $20–$60 depending on the CCA rating required
- Recoil starter assembly: $15–$45 for a full replacement kit
- Pull cord only: $5–$12 — the cheapest repair on this list
- Shop labor (if not DIY): $50–$100/hour — most starter repairs take 1–2 hours
As a general rule, if the repair cost exceeds 50% of the mower's current value, replacement becomes worth considering. A ten-year-old walk-behind mower worth $120 isn't worth a $90 shop bill for a single repair.
Keeping your mower running well also improves lawn health downstream — well-cut grass clippings, for example, can act as free fertilizer. See our post on whether grass clippings make good fertilizer for more on that.
Why Your Mower Won't Start and How to Fix It
Common Symptoms and What They Mean
- Single loud click when you turn the key: Solenoid is receiving the signal but the starter motor isn't engaging — check battery voltage and starter motor connections
- Rapid clicking sounds: Battery is too weak to hold voltage under load — charge or replace the battery
- Complete silence: No signal reaching the solenoid — check the ignition switch, safety seat switch, or blown fuse
- Starter spins but engine doesn't crank: The pinion gear isn't engaging the flywheel — starter motor likely needs replacement
- Pull cord won't retract: Broken recoil spring on a pull-start mower — replace the spring or full recoil assembly
- Engine cranks but won't fire: Starter is working fine — the issue is fuel, spark, or compression instead
Solenoid Bypass Test
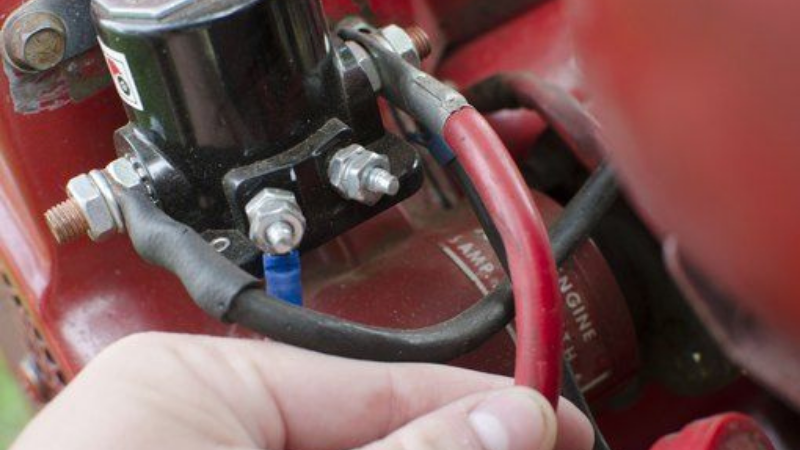

If you hear a click but the motor doesn't spin, you can test whether the solenoid is the problem with a simple bypass. Do this only for diagnostic purposes — not as a permanent fix.
- Disconnect the ignition key and remove the spark plug wire for safety
- Locate the solenoid — typically a small cylindrical or rectangular component near the battery with two large copper terminal posts
- Use an insulated screwdriver to briefly bridge the two large copper posts
- If the starter motor spins, the solenoid is faulty and needs replacement
- If nothing happens, the starter motor itself has failed
This test isolates one variable at a time — a methodical approach that prevents you from replacing expensive parts unnecessarily. For more on related engine components, see our guide on how a lawn mower ignition coil works and our overview of lawn mower engine operation.
Frequently Asked Questions
How do I know if my lawn mower starter motor is bad?
The most common sign is a single loud click when you turn the key — the solenoid fires but the motor doesn't spin. You can confirm this with the solenoid bypass test: bridge the two large copper posts on the solenoid with an insulated screwdriver. If the starter still doesn't spin, the motor has likely failed and needs replacement.
Can a bad solenoid prevent a lawn mower from starting?
Yes — the solenoid is the gateway between your battery and starter motor. If the solenoid's internal contacts are corroded or burnt, it won't close the high-current circuit, so the starter motor receives no power even if the battery is fully charged. Solenoids are inexpensive (usually $8–$25) and straightforward to replace.
How long does a lawn mower starter motor last?
A starter motor on a well-maintained mower can last many years — often the life of the machine. Premature failure usually results from repeated cranking attempts (which overheat the motor), corroded connections that force the motor to work harder, or a weak battery that causes extended cranking cycles. Regular terminal cleaning and battery maintenance are the best ways to extend starter life.
Most lawn mower starter problems trace back to a corroded terminal or a weak battery — fix those first, and you'll solve the majority of no-start issues without touching a single mechanical part.


About Lee Safin
Lee Safin was born near Sacramento, California on a prune growing farm. His parents were immigrants from Russia who had fled the Bolshevik Revolution. They were determined to give their children a better life than they had known. Education was the key for Lee and his siblings, so they could make their own way in the world. Lee attended five universities, where he studied plant sciences and soil technologies. He also has many years of experience in the U.S. Department of Agriculture as a commercial fertilizer formulator.
Get FREE Gardening Gifts now. Or latest free toolsets from our best collections.
Disable Ad block to get all the secrets. Once done, hit any button below