Last spring, I pulled my push mower out of storage and pressed the primer bulb three times — on the third press, the rubber cracked and fuel dripped down my fingers. No hardware store was open, and I had half an acre of overgrown grass waiting. That experience sent me on a deep dive into exactly how to start a lawn mower without a primer bulb, and what I found out changed how I approach small-engine troubleshooting entirely. Whether your bulb cracked, hardened, or fell off entirely, this guide walks you through every reliable option. For more hands-on guides like this one, visit our gardening tips section.
The primer bulb's job is straightforward: it manually forces a small amount of fuel through the carburetor so the engine has something to ignite on the first pull. When it fails, that fuel delivery step gets skipped — but your carburetor still functions. You just need to replicate what the bulb was doing through other means, and there are several reliable ways to do exactly that.
A word before diving in: make sure your mower's other fundamentals are solid. A fouled spark plug or clogged air filter will prevent starting regardless of how you prime the engine. And while you're getting the yard back in shape, if weeds have been taking over while the mower sat idle, this guide on how to get rid of weeds forever is worth bookmarking too.
Contents
- How to Start a Lawn Mower Without a Primer Bulb (Step by Step)
- Why Primer Bulbs Fail — and What That Tells You
- Busting the Biggest Myths About Primer Bulbs
- Fuel System Care That Prevents Primer Problems
- How Craftsman and Briggs & Stratton Mowers Handle This
- When to Work Around the Primer — and When to Replace It
- Starting Methods Compared: A Quick Overview
- Frequently Asked Questions
- Final Thoughts
How to Start a Lawn Mower Without a Primer Bulb (Step by Step)
What You Need Before You Begin
Before you attempt any alternative starting method, gather these items:
- Fresh gasoline — no more than 30 days old (ethanol blends degrade quickly)
- A small funnel or eyedropper
- Clean rags
- Safety glasses and nitrile gloves
- Your mower's owner manual for carburetor access specifics
Stale fuel is the most common reason these workarounds fail. If your gas has been sitting in the tank since last season, drain it completely and refill with fresh fuel before trying anything else. This single step resolves more cold-start failures than any other fix.
Pro tip: Add a fuel stabilizer any time you store a gas-powered mower for more than two weeks. It prevents fuel from breaking down and depositing varnish in your carburetor's jets.
The Starting Process
Here's how to start a lawn mower without a primer bulb using the most reliable method — a direct carburetor fuel dose:
- Locate the air filter housing. Remove the cover and pull out the air filter. You'll see the carburetor throat directly behind it.
- Add fuel directly. Using an eyedropper or small funnel, pour approximately one teaspoon (5 ml) of fresh gasoline into the carburetor throat.
- Replace the air filter. Put the filter back before pulling the starter cord — you need it in place to maintain proper air-fuel ratio.
- Set the choke to full. If your mower has a choke lever, engage it to the "choke" or "start" position.
- Pull the starter cord firmly. Give one or two strong, full pulls. The engine should fire within the first two pulls if fuel delivery was the only issue.
- Adjust the choke. Once the engine catches, move the choke lever to the "run" position after a few seconds of idling.
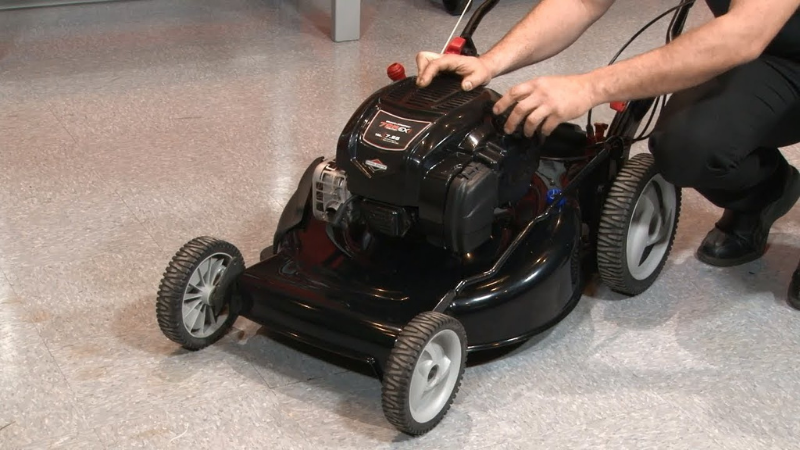
If the engine fires but stalls immediately, repeat the fuel injection step once more. A two-teaspoon dose sometimes works better on larger displacement engines. If you've tried four or five times without success, the problem goes beyond the missing primer bulb.
Why Primer Bulbs Fail — and What That Tells You
Physical Damage and Aging
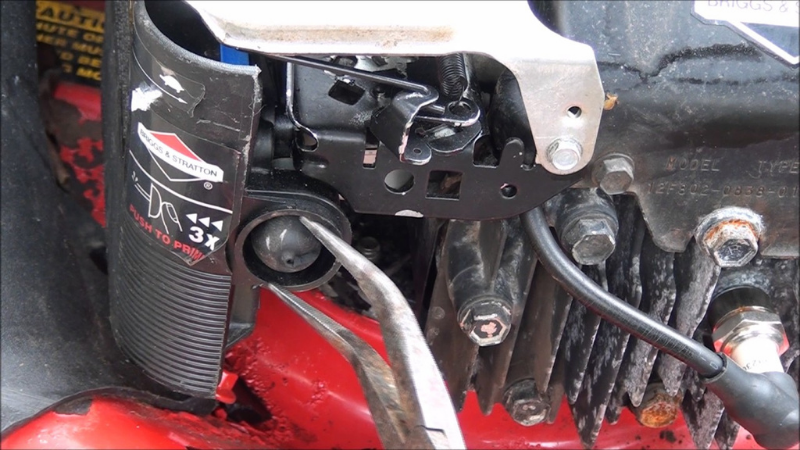
Primer bulbs are made from rubber or synthetic compounds that degrade over time, especially when exposed to ethanol-blended gasoline. Modern pump gas with 10% ethanol (E10) accelerates bulb deterioration, causing the material to swell, crack, or turn brittle within a few seasons. Signs your bulb has physically failed:
- Visible cracks or splits in the rubber
- The bulb feels stiff and doesn't spring back when pressed
- Fuel leaks around the bulb housing after pressing
- The bulb collapses and won't return to its original domed shape
Fuel System Clogs and Contamination
Sometimes the bulb looks intact but still doesn't prime properly. This usually points to a clogged fuel line or a gummed-up carburetor — both common after extended storage. The EPA has documented how ethanol in gasoline contributes to varnish deposits in small-engine fuel systems. When those deposits block the tiny passages inside the carburetor, the bulb can't draw fuel even if it's physically intact. Regular seasonal maintenance is the only real prevention.
Warning: Never use ether-based starting fluid as a substitute for priming a lawn mower engine. It strips the protective oil film from cylinder walls and can cause permanent engine damage.
Busting the Biggest Myths About Primer Bulbs
Myth: You Can't Start the Engine Without a Primer
This is the most pervasive misconception. The primer bulb is a convenience feature, not a mechanical necessity. Small engines existed and ran reliably before primer bulbs became standard equipment. Once the engine cranks, the carburetor is fully capable of drawing fuel on its own. The direct fuel injection method described above replicates exactly what the bulb does — just manually. The engine doesn't know the difference.
Myth: A Missing Primer Bulb Means the Carburetor Is Broken
A failed primer bulb tells you nothing about the carburetor's condition. The two are connected but functionally independent. You can have a perfectly clean, functional carburetor alongside a completely failed primer bulb — and vice versa. Don't let a cracked bulb send you down a carburetor-rebuild rabbit hole before you've tested the basic workaround. If that workaround gets the engine running, your carburetor is fine.
Other myths worth dismissing quickly:
- "You must press the primer bulb exactly three times." False — the right number depends on your specific engine and ambient temperature. Cold starts often need more.
- "Primer bulb replacement requires a mechanic." Also false — a $3 replacement bulb and a flathead screwdriver handle the job on most push mowers.
- "Electric-start mowers don't have primer issues." Not accurate — many electric-start models still rely on a primer bulb for cold starts.
Fuel System Care That Prevents Primer Problems
Cleaning the Carburetor
A clean carburetor is your best insurance against starting failures. If your mower sat for more than two months, inspect the carb before the mowing season begins. Remove the bowl, look for brown or yellowish varnish deposits, and use carburetor cleaner spray to dissolve any buildup. The main jet — a small brass fitting with a hole through the center — is the most frequently clogged component. A thin wire or toothpick can clear it when spray alone doesn't work.
Steps for a basic carburetor clean:
- Turn off the fuel valve (if present) and disconnect the fuel line
- Remove the carburetor bowl bolt and slide off the bowl
- Spray carburetor cleaner through all visible passages
- Clear the main jet with thin wire if needed
- Reassemble and test with the direct-fuel method
Checking Fuel Lines and Filters
Fuel lines harden and crack over time, just like primer bulbs do. A cracked line draws air instead of fuel, mimicking primer bulb failure exactly. Squeeze each fuel line along its full length — any section that feels stiff or brittle should be replaced. Replacement fuel line kits run under $10 at any hardware store. The inline fuel filter, usually a small cylindrical component on the line itself, should be swapped out every season regardless of how it looks. Pairing this kind of engine maintenance with good lawn-prep habits, like mixing grass seed and fertilizer correctly, keeps your entire lawn routine running without interruption.
How Craftsman and Briggs & Stratton Mowers Handle This
Craftsman Mowers
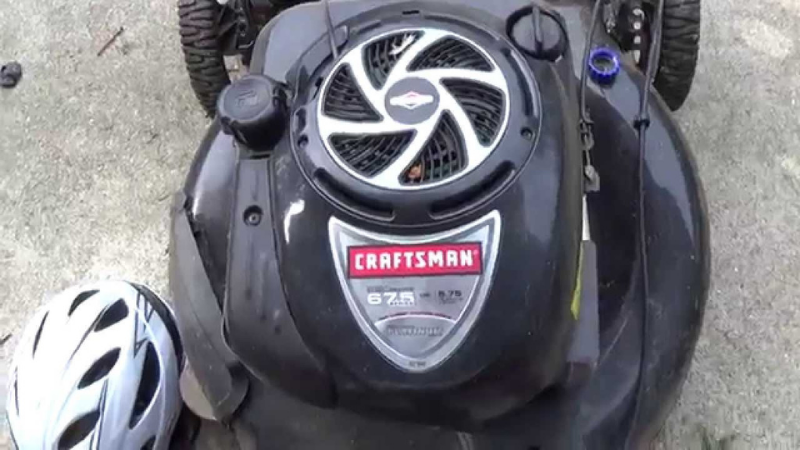
Craftsman push mowers — particularly older models with 550e and 625e series engines — use a standard primer bulb mounted directly on the carburetor. These bulbs are universally sized and easy to find at any hardware store. When the bulb fails on a Craftsman, the direct fuel injection method works reliably. Locate the air filter housing on the left side of the engine, remove the cover, and proceed with the one-teaspoon dose described in the step-by-step section above.
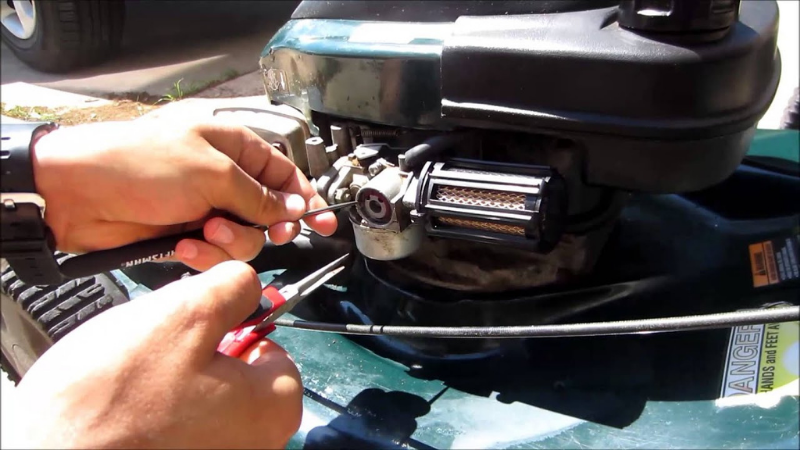
The Craftsman Platinum series uses a slightly different primer arrangement. These engines have a larger displacement and may require up to two teaspoons of fuel for a cold start without the primer bulb in place. Choke lever position is critical on these models — ensure it's fully engaged before pulling the starter cord.
Briggs & Stratton Engines
Briggs & Stratton engines power a large share of push mowers sold in North America. Most Series 450e through 725ex engines include a primer bulb. The 500e and 550ex series are the most common and follow the same direct-fuel workaround without issue. One distinction worth knowing: Briggs & Stratton uses a fixed-main-jet carburetor design on many models, giving those engines slightly larger fuel passages that resist clogging better than some competitors. If a Briggs-powered mower still won't start after the workaround, check the spark plug before going further — these engines burn through plugs faster than most people expect, especially after extended storage.
When to Work Around the Primer — and When to Replace It
When a Workaround Makes Sense
The direct-fuel method is a short-term solution, not a permanent one. It makes sense in these specific situations:
- You need to mow right now and a replacement part isn't available
- The mower is old and a repair investment isn't worth it for occasional seasonal use
- You're mid-task and the hardware store is closed
- You want to confirm the primer bulb was the only issue before ordering parts
Important: Adding fuel directly to the carburetor creates a brief fire risk if you over-add. Use only a teaspoon at a time and keep all open flames away from the work area.
When to Just Replace the Bulb
If you plan to use this mower regularly through the season, replace the bulb — full stop. Replacement bulbs are nearly universally sized. Most push mower primer bulbs share the same dimensions, and a pack of three costs under $5 online or at any hardware store. The swap takes less than ten minutes: pry out the old bulb with a flathead screwdriver, press the new one in until it seats flush, and you're done. No additional tools required on most models. A functioning primer bulb delivers faster, more reliable cold starts every single time — the workaround works, but it adds a step you simply don't need once the part is replaced.
Starting Methods Compared: A Quick Overview
Not every situation calls for the same approach. Here's how the most common starting methods stack up when you're dealing with a missing or broken primer bulb:

| Starting Method | Cost | Tools Required | Risk Level | Best For |
|---|---|---|---|---|
| Direct fuel injection (carburetor) | $0 | Eyedropper or funnel | Low | Immediate, temporary fix |
| Primer bulb replacement | $3–$5 | Flathead screwdriver | None | Best long-term solution |
| Carburetor clean + restart | $5–$15 | Carb cleaner, basic tools | Low | When clogging is suspected |
| Choke-only method (no added fuel) | $0 | None | None | Warm engine restarts only |
| Ether-based starting fluid | $6–$10 | Spray can | High | Not recommended for mowers |
The direct fuel injection method wins on cost and accessibility. Primer bulb replacement wins on long-term convenience. For most people, the right move is to use the workaround once, then order a replacement bulb before the next mow.
Frequently Asked Questions
Can I start a lawn mower without pressing the primer bulb at all?
Yes, but only under specific conditions. A warm engine that was running recently doesn't need priming — residual fuel is already present in the carburetor. A cold start almost always requires some form of priming, whether through the bulb or the direct fuel injection method described in this guide.
How much fuel should I add directly to the carburetor?
One teaspoon (5 ml) is the right starting amount for most push mower engines. Larger engines with higher displacement may need up to two teaspoons. Never add more than that at once — excess fuel floods the engine and makes starting harder, not easier.
Is it safe to run the mower with no primer bulb installed?
Yes, provided the primer bulb opening is sealed or covered. An exposed hole in the carburetor housing allows debris and unfiltered air into the fuel system. If the bulb has been removed, seal the opening with appropriate tape or a rubber plug until a replacement arrives.
What should I do if I accidentally flood the engine?
Let the mower sit for ten to fifteen minutes with the choke fully open (off). Then pull the starter cord slowly several times to purge excess fuel through the exhaust. After that, attempt a normal start with the choke in the run position — do not re-add fuel.
How long does a primer bulb typically last?
Most primer bulbs last three to five years under normal use. Exposure to ethanol-blended fuel and repeated outdoor temperature cycles accelerates degradation. Replacing it proactively every three seasons costs under $5 and eliminates unexpected cold-start failures entirely.
Does the choke do the same thing as a primer bulb?
Not exactly. The choke restricts airflow to create a richer fuel mixture, helping a cold engine start. The primer bulb physically pushes fuel into the carburetor. They work in tandem — closing the choke without any fuel present still won't reliably fire a cold engine that hasn't been primed by another method first.
Can I use carburetor cleaner spray to prime the engine in an emergency?
Carb cleaner can work as a very short-term starting aid sprayed into the air intake, but it is harsh on rubber seals and internal engine components. Use it only as a true last resort. When you have the option, always use fresh gasoline — it's safer and more effective for priming.
Why does my mower start fine when warm but struggle on cold starts?
Cold starts require more fuel because the engine, carburetor, and fuel lines are all at ambient temperature. A deteriorating primer bulb that's partially functional may manage warm restarts but fail to deliver enough fuel for a cold start. This pattern is a reliable early warning that your primer bulb needs replacement before it fails completely.
Final Thoughts
Knowing how to start a lawn mower without a primer bulb is the kind of practical skill that pays off the moment you need it — and now you have it. Use the direct fuel injection method to get through your current session, then pick up a replacement primer bulb this week. They cost next to nothing, the swap takes minutes, and you won't have to think about this problem again all season. Go get the lawn done.


About Lee Safin
Lee Safin was born near Sacramento, California on a prune growing farm. His parents were immigrants from Russia who had fled the Bolshevik Revolution. They were determined to give their children a better life than they had known. Education was the key for Lee and his siblings, so they could make their own way in the world. Lee attended five universities, where he studied plant sciences and soil technologies. He also has many years of experience in the U.S. Department of Agriculture as a commercial fertilizer formulator.
Get FREE Gardening Gifts now. Or latest free toolsets from our best collections.
Disable Ad block to get all the secrets. Once done, hit any button below