How long to grow potatoes is one of the first questions any home gardener confronts before committing to a bed or container. The answer is more specific than most people expect: early-season varieties mature in 70 to 90 days, mid-season types take 90 to 110 days, and late-season varieties need 110 to 135 days from planting to harvest. Choosing the right variety for the available growing season is the single most important decision in the process. For a broader overview of vegetable gardening fundamentals, the gardening tips section offers essential guidance for both beginners and experienced growers.

Potatoes are one of the most rewarding crops in the home garden. They tolerate a range of soil types, thrive in containers and raised beds, and produce generous yields relative to the space they occupy. The challenge for most growers isn't the growing itself — it's the timing. Planting into soil that's too cold, missing the hilling window, or harvesting before skins have set are the most common sources of a disappointing season. Getting those timing decisions right is what separates a mediocre result from an impressive one.
This guide covers the complete potato-growing process: selecting and preparing seed potatoes, planting at the right depth and time, caring for the crop through each growth stage, and recognizing when it's ready to dig. It also covers variety-specific timelines, real-world yield data, cost breakdowns, and the practical differences between how first-time growers and seasoned gardeners approach the crop.
Contents
- How Long to Grow Potatoes: The Step-by-Step Planting Process
- Potato Variety Timelines: Early, Mid-Season, and Late
- Caring for Potato Plants Through Each Growth Stage
- When to Harvest Potatoes — and When to Wait
- Real-World Results: What a Home Potato Patch Delivers
- The True Cost of a Home Potato Patch
- First-Timer vs. Experienced Grower: Where Approach Diverges
- Frequently Asked Questions
- Next Steps
How Long to Grow Potatoes: The Step-by-Step Planting Process
The potato's growth timeline begins the moment seed potatoes go into the ground — but preparation before planting has a direct impact on how quickly and vigorously they establish. Rushing this phase is one of the most common ways growers add unnecessary weeks to their harvest date.
Selecting and Preparing Seed Potatoes
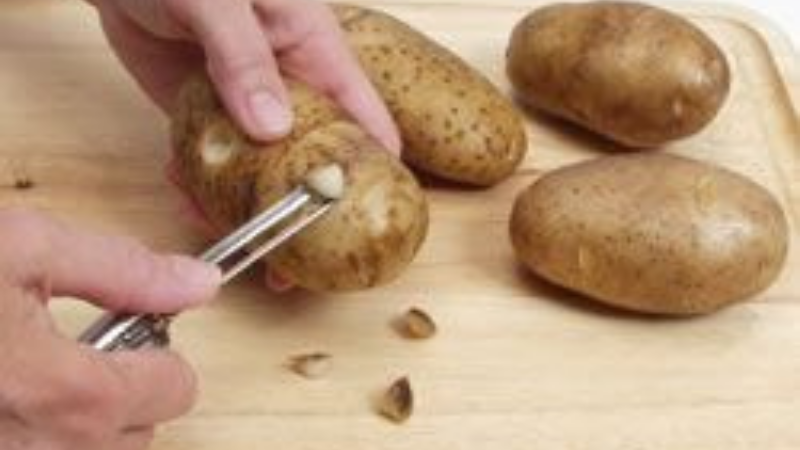
Certified seed potatoes are the recommended starting point for any serious grower. Unlike grocery-store potatoes, which are often treated with sprout inhibitors, certified seed potatoes are bred and stored specifically for planting. Selecting firm, disease-free tubers with well-developed eyes — the small indentations from which sprouts emerge — sets the crop up for reliable germination from the start.
Chitting, or pre-sprouting, is a preparation technique where seed potatoes are placed in a cool, bright space for two to four weeks before planting. This head start can shave one to two weeks off the overall growing time — a meaningful advantage for growers working within a short frost-free season.
Cutting Seed Potatoes for More Plants
Larger seed potatoes can be cut into sections, each containing at least one eye, to multiply the number of plants from a single purchase. This technique, known as vegetative propagation, is covered in depth in the GardenSynthesis guide on growing potatoes with vegetative propagation. After cutting, sections should rest for 24 to 48 hours to develop a protective callus layer over the exposed surface. This step reduces rot risk significantly once pieces are in the ground.
Planting Depth and Spacing
Proper planting depth and spacing directly affect tuber development and how long the crop takes to reach harvestable size. The standard planting guidelines:
- Plant seed pieces 10–15 cm (4–6 inches) deep in well-loosened, well-draining soil
- Space pieces 30–38 cm (12–15 inches) apart within rows
- Leave 60–90 cm (24–36 inches) between rows to allow adequate room for hilling
- In containers, use a minimum 40-litre (10-gallon) vessel per plant
Soil temperature at planting is a critical variable. Potatoes establish best when soil sits at 10–15°C (50–60°F). Cold soil below this range delays emergence and invites rot; soil above 27°C (80°F) slows growth and reduces tuber set.
Potato Variety Timelines: Early, Mid-Season, and Late
The single biggest factor in how long potatoes take to grow is variety selection. Seed catalogs and nursery tags list "days to maturity" as the standard reference — counted from the planting date, not from when sprouts first emerge above the soil surface. Treat these figures as reliable averages under good conditions, not fixed guarantees.
| Variety Type | Common Examples | Days to Maturity | Skin Type | Best Use |
|---|---|---|---|---|
| Early season | Red Norland, Yukon Gold, Caribe | 70–90 days | Thin | Fresh eating |
| Mid-season | Kennebec, Atlantic, Chieftain | 90–110 days | Medium | All-purpose cooking |
| Late season | Russet Burbank, Katahdin, Elba | 110–135 days | Thick | Long-term storage |
Early-Season Varieties (70–90 Days)
Early-season varieties are the fastest producers in the garden. Red Norland, Yukon Gold, and Caribe typically mature between 70 and 90 days after planting. These varieties produce medium-sized tubers with thin skins and are best eaten fresh rather than stored for extended periods. They are the natural choice for growers with short frost-free seasons or for those who simply want results quickly without committing to a long growing window.
Mid-Season Varieties (90–110 Days)
Mid-season varieties strike a balance between speed and yield. Kennebec, Atlantic, and Chieftain fall into this window, producing larger tubers than early types with better storage potential. Most all-purpose potato recipes are written with mid-season varieties in mind. Growers with a standard temperate growing season — roughly 120 frost-free days — can reliably fit a mid-season crop into their calendar without scheduling concerns.
Late-Season Varieties (110–135 Days)
Late-season varieties — Russet Burbank, Katahdin, and Elba among them — demand the most time but deliver the most substantial harvests. These are the storage champions: thick skins, dense flesh, and excellent keeping qualities make them the choice for growers who want to fill a root cellar or preserve a bulk supply through the colder months. They require a minimum of 110 frost-free days, which limits their viability in northern short-season regions.
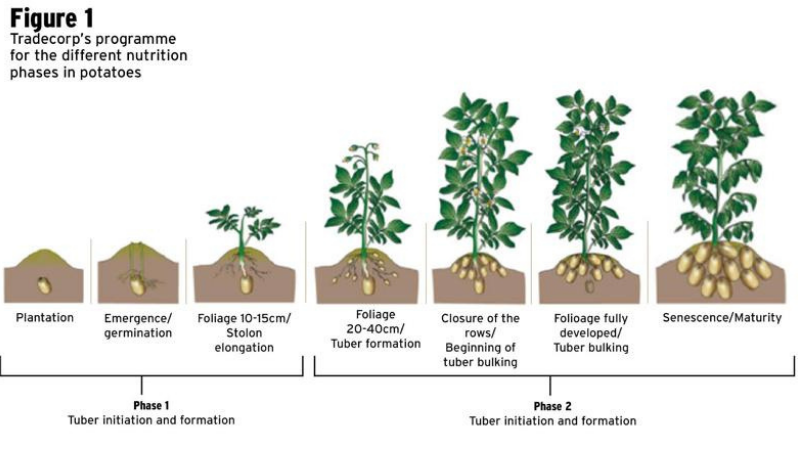
Caring for Potato Plants Through Each Growth Stage
Once seed potatoes are in the ground, the work shifts to consistent maintenance. Skipping hilling, irregular watering, or mismanaged fertilization all extend the time to harvest and reduce total yield. These tasks aren't complicated, but they are non-negotiable for a healthy crop.
Hilling: The Non-Negotiable Task
Hilling — mounding soil up around the base of potato stems as they grow — serves two essential purposes: it blocks sunlight from reaching developing tubers (preventing the greening and solanine production that makes them inedible) and it creates more soil volume for tubers to expand into. Standard practice:
- Begin hilling when plants reach 15–20 cm (6–8 inches) tall
- Mound soil to cover all but the top third of the plant
- Repeat every two to three weeks until the mound reaches 20–25 cm (8–10 inches) high
- Layer organic mulch around — not directly against — stems to retain moisture
Growers who skip hilling consistently report smaller yields and a higher percentage of green-shouldered tubers. Using grass clippings as mulch around potato hills is a low-cost option that adds organic matter to the soil while moderating temperature fluctuations between waterings.
Watering Consistently
Potatoes need approximately 2.5 cm (1 inch) of water per week during active growth. The critical period for consistent moisture is tuber set, which begins roughly six to eight weeks after planting and lasts several weeks. Alternating drought and heavy irrigation during this window causes hollow heart, cracking, and knobby deformation. Drip irrigation is the most efficient delivery method for in-ground plots, delivering water directly to the root zone without wetting foliage.
Fertilizing Through the Season
Potatoes are heavy feeders, particularly for potassium and phosphorus. A practical fertilization schedule keeps the crop on track without overfeeding:
- At planting: incorporate a balanced slow-release fertilizer (10-10-10) directly into the planting row
- At first hilling: apply a side-dressing of low-nitrogen, high-potassium fertilizer to support tuber development
- After tuber set: avoid additional nitrogen entirely — it promotes leafy top growth at the direct expense of tuber size
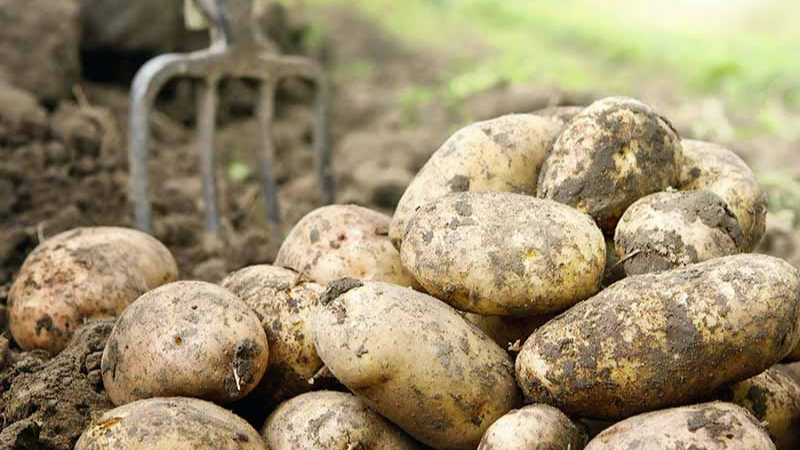
When to Harvest Potatoes — and When to Wait
Timing the harvest correctly matters as much as any decision made earlier in the season. Digging too early produces underdeveloped, thin-skinned tubers with a short shelf life. Waiting too long in wet conditions invites rot, blight, and slug damage. Understanding the distinction between a "new potato" harvest and a full maincrop harvest opens up practical options for different grower goals.
Reading the Signals the Plant Sends
The most reliable harvest indicator is foliage die-back. When plant tops yellow, wilt, and collapse — a stage commonly called "vine kill" — the tubers have completed their development cycle. For maincrop varieties, growers should wait an additional two weeks after vine kill before digging, giving skins time to fully set. Set skins resist bruising during harvest and extend storage life considerably.
A simple field test confirms readiness: dig up one plant and rub a thumb firmly across a tuber. If the skin slips away easily, more time is needed. If it holds firm under pressure, the crop is ready to harvest across the entire plot.
Early Digging: The New Potato Strategy
New potatoes — small tubers dug before full maturity — are a legitimate and popular harvest approach. Most varieties produce harvestable new potatoes around 60 to 70 days after planting. The tradeoff is real: removing tubers early terminates further production from those plants. Growers who want both new potatoes and a main-season crop can harvest selectively from the outer edges of a hill without pulling the entire root system, allowing the remaining tubers to continue developing toward full size.
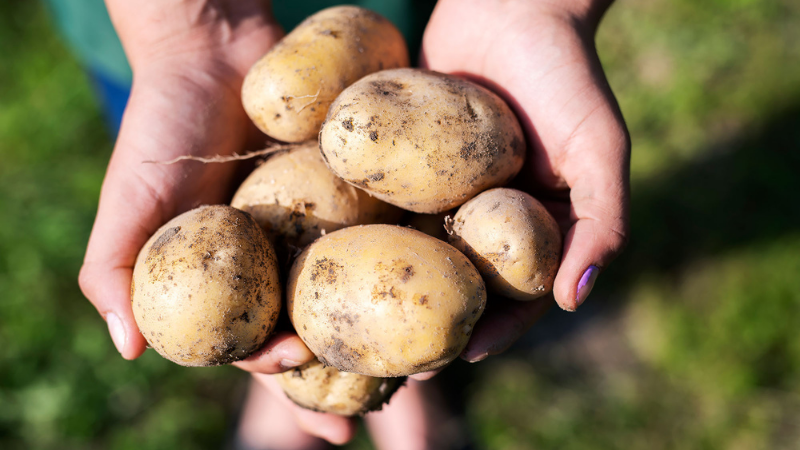
Real-World Results: What a Home Potato Patch Delivers
University extension guides and seed catalog descriptions provide averages. Actual results vary considerably based on soil quality, local climate, and how consistently maintenance tasks are completed. Understanding realistic yield ranges helps calibrate expectations before the first seed potato goes in the ground.
Container and Raised Bed Growing
Container-grown potatoes offer controlled conditions and easy harvesting but constrained yield. A standard 40-litre (10-gallon) grow bag typically produces 500g to 1.5 kg (1–3 lbs) per plant — substantially less than in-ground yields but entirely workable for urban gardens, patios, and balconies. The growing timeline remains identical to open-ground planting; root restriction doesn't meaningfully accelerate or extend maturity. Growers exploring other vegetables in container and limited-light environments can find overlapping nutrient-management principles in the GardenSynthesis guide on growing tomatoes with artificial light.
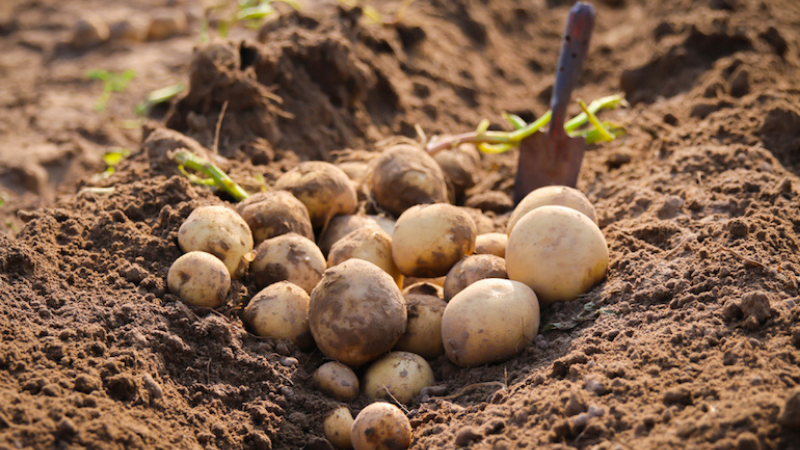
In-Ground Garden Patches
In-ground growing produces the highest yields. A well-maintained 3-metre row of early-season potatoes typically delivers 4–6 kg (9–13 lbs) from 450g (1 lb) of seed potatoes — a 10:1 return is a reasonable target for experienced growers in amended soil. Late-season varieties grown to full maturity can push that ratio higher. First-time growers should plan for a 5:1 to 7:1 return, with performance improving through successive seasons as soil preparation and timing precision develop. The soil-health fundamentals that support potato production are equally relevant in other vegetable crops; the asparagus growing guide covers drainage, pH management, and organic matter principles that transfer directly to potato beds.
The True Cost of a Home Potato Patch
Growing potatoes at home is one of the most cost-effective vegetable gardening projects available. The budget varies based on setup type and scale, but the economics consistently favor growing over buying once initial costs are spread across multiple seasons.
Startup Costs
| Item | Typical Cost Range | Notes |
|---|---|---|
| Certified seed potatoes (1 kg) | $4–$12 | Grocery-store potatoes are unreliable substitutes |
| Raised bed or grow bag (optional) | $15–$80 | Not required for in-ground planting |
| Soil amendment / compost | $10–$30 | One-time investment; lower in subsequent seasons |
| Fertilizer (balanced + potassium) | $8–$20 | One bag typically covers multiple growing seasons |
| Basic tools (garden fork, trowel) | $20–$50 | Reusable across many seasons |
Ongoing Annual Expenses
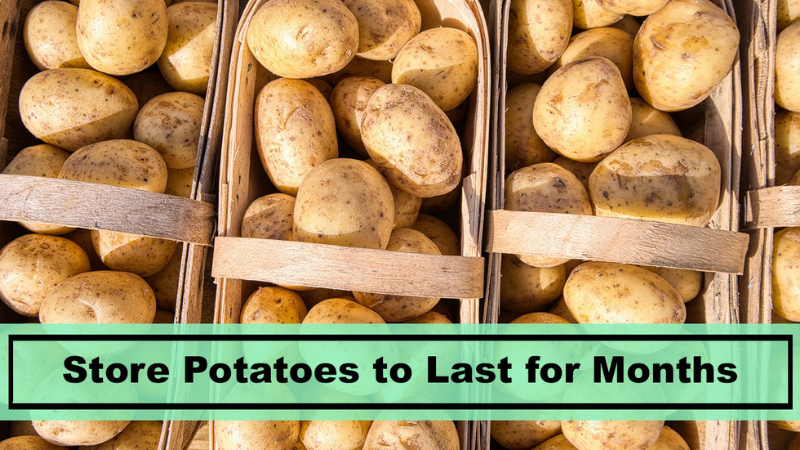
After the first season, recurring costs drop significantly. Seed potatoes remain the primary annual purchase; soil amendment needs decrease as organic matter accumulates in the bed. A 3-metre plot producing 5–6 kg of potatoes costs roughly $15–$25 per year in consumables after the first season. Home-grown potatoes are genuinely cost-competitive with supermarket pricing once tools and infrastructure are amortized. Growers who save and store their own seed potatoes — selecting the healthiest, most uniform tubers from each harvest — can reduce seed costs to near zero over time, provided disease-free, cool, and dry storage conditions are maintained.
First-Timer vs. Experienced Grower: Where Approach Diverges
The gap between a first-season grower and someone in their third or fourth season isn't about secret techniques. It's about accumulated knowledge: what to watch for, when to act, and how to read the crop. Soil interpretation, weather-pattern awareness, and variety selection all become second nature with experience.
Common First-Season Mistakes
Most first-time potato growers make the same predictable errors:
- Planting too early into cold, waterlogged soil that promotes rot rather than sprouting
- Skipping chitting, which extends the active growing period by one to two weeks unnecessarily
- Inconsistent hilling, resulting in green-shouldered tubers and reduced usable yield per plant
- Digging too soon before skins have fully set — typically prompted by impatience near the expected maturity date
- Choosing a late-season variety for a short growing season, resulting in a crop caught by early frost before maturity
The beginner gardening guide covers broader soil preparation and seasonal timing fundamentals that apply across all vegetable crops, including the specific conditions potatoes need to establish and thrive.
What Experienced Growers Do Differently
Experienced growers treat the crop as an integrated system rather than a series of individual tasks. They test soil pH — the optimal range for potatoes is 5.0 to 6.5 — before planting rather than attempting to adjust conditions mid-season. They track variety performance across multiple seasons and select accordingly each spring. They also rotate potato plots on a three- to four-year cycle. According to established crop rotation principles, this practice is the single most effective preventive strategy against soilborne pathogens like Phytophthora infestans (late blight) and Rhizoctonia solani (black scurf) that accumulate in repeatedly planted potato ground.
Frequently Asked Questions
How long to grow potatoes from planting to harvest?
The timeline depends entirely on variety type. Early-season varieties like Yukon Gold and Red Norland mature in 70 to 90 days from planting. Mid-season types such as Kennebec and Atlantic take 90 to 110 days. Late-season varieties including Russet Burbank and Katahdin need 110 to 135 days. These counts run from the planting date, not from when sprouts first appear above the soil surface.
What is the fastest-growing potato variety?
Among widely available certified varieties, Caribe and Red Norland are among the fastest, maturing in as few as 70 days under good growing conditions. Chitting seed potatoes before planting accelerates this further by one to two weeks, making early-season crops available even sooner into the growing period.
Can potatoes be grown in containers or grow bags?
Yes. A 40-litre (10-gallon) container supports one to two plants and typically yields 500g to 1.5 kg of potatoes per plant. The growing timeline is identical to in-ground planting. Container growing is well-suited to small spaces, patios, and urban gardens where dedicated beds are unavailable. Consistent watering and fertilization become more critical in containers due to the limited soil volume available to roots.
How do growers know when potatoes are ready to harvest?
The primary signal is foliage die-back — when plant tops yellow, wilt, and collapse (vine kill), the tubers have completed their development. For maincrop varieties, waiting an additional two weeks after vine kill allows skins to set fully, extending storage life. A skin-slip test confirms readiness: rub a thumb firmly across a freshly dug tuber; if the skin holds without sliding off, the crop is ready to harvest.
What happens if potatoes are left in the ground too long after maturity?
In dry conditions, over-mature potatoes face mainly the risk of early frost exposure, which damages tubers at the cellular level and ruins storage potential. In wet conditions, leaving potatoes past vine kill sharply increases the risk of late blight infection, slug damage, and bacterial soft rot. Harvesting within two to three weeks of vine kill eliminates the majority of these post-maturity risks.
Next Steps
- Check the local average last and first frost dates, then count forward from the safe planting date to confirm a chosen variety's days-to-maturity fits within the available frost-free window.
- Source certified seed potatoes from a reputable nursery or seed supplier and begin chitting them in a cool, bright location three to four weeks before the planned planting date.
- Test garden soil pH with an inexpensive kit and amend with sulfur (to lower) or lime (to raise) if the reading falls outside the 5.0–6.5 range potatoes prefer.
- Prepare hilling materials — extra compost or loose garden soil — and have them staged near the growing area so the first hilling happens on time when plants reach 15 cm tall.
- Designate a storage location — cool, dark, and well-ventilated, ideally 4–7°C (40–45°F) — before harvest so cured potatoes move directly into proper conditions without delay.


About Lee Safin
Lee Safin was born near Sacramento, California on a prune growing farm. His parents were immigrants from Russia who had fled the Bolshevik Revolution. They were determined to give their children a better life than they had known. Education was the key for Lee and his siblings, so they could make their own way in the world. Lee attended five universities, where he studied plant sciences and soil technologies. He also has many years of experience in the U.S. Department of Agriculture as a commercial fertilizer formulator.
Get FREE Gardening Gifts now. Or latest free toolsets from our best collections.
Disable Ad block to get all the secrets. Once done, hit any button below